
Storage Management
This document guides you through managing the storage resources for your VPS, including attaching and detaching Disks, as well as using Snapshots for data backup and recovery.
Purchase Disk
1. Log into the console and navigate to the Disk list.
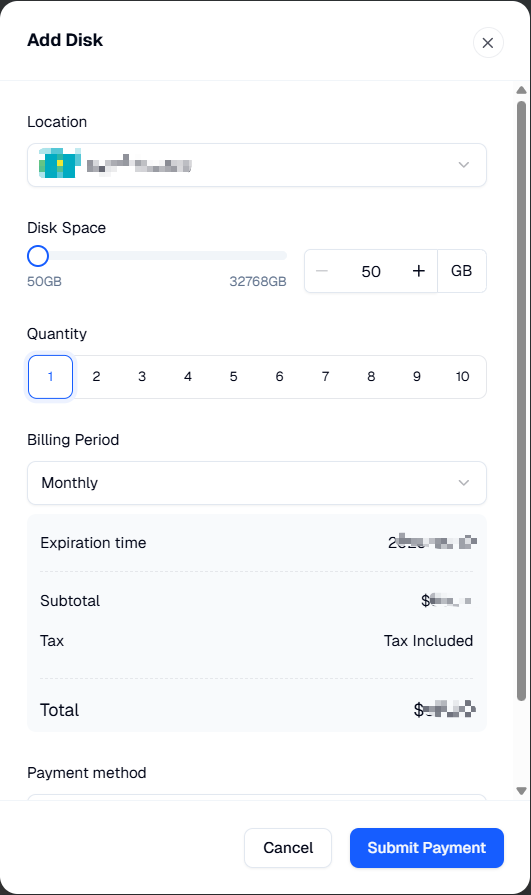
2. Click "Add Disk". In the purchase dialog that appears, select your configuration, as shown in the image below:
Attach Disk
You can attach a Disk (to be used as a data disk for your VPS) to any VPS within the same region. Each VPS supports attaching up to 15 data disks.
1. Log into the console and navigate to the Disk list.
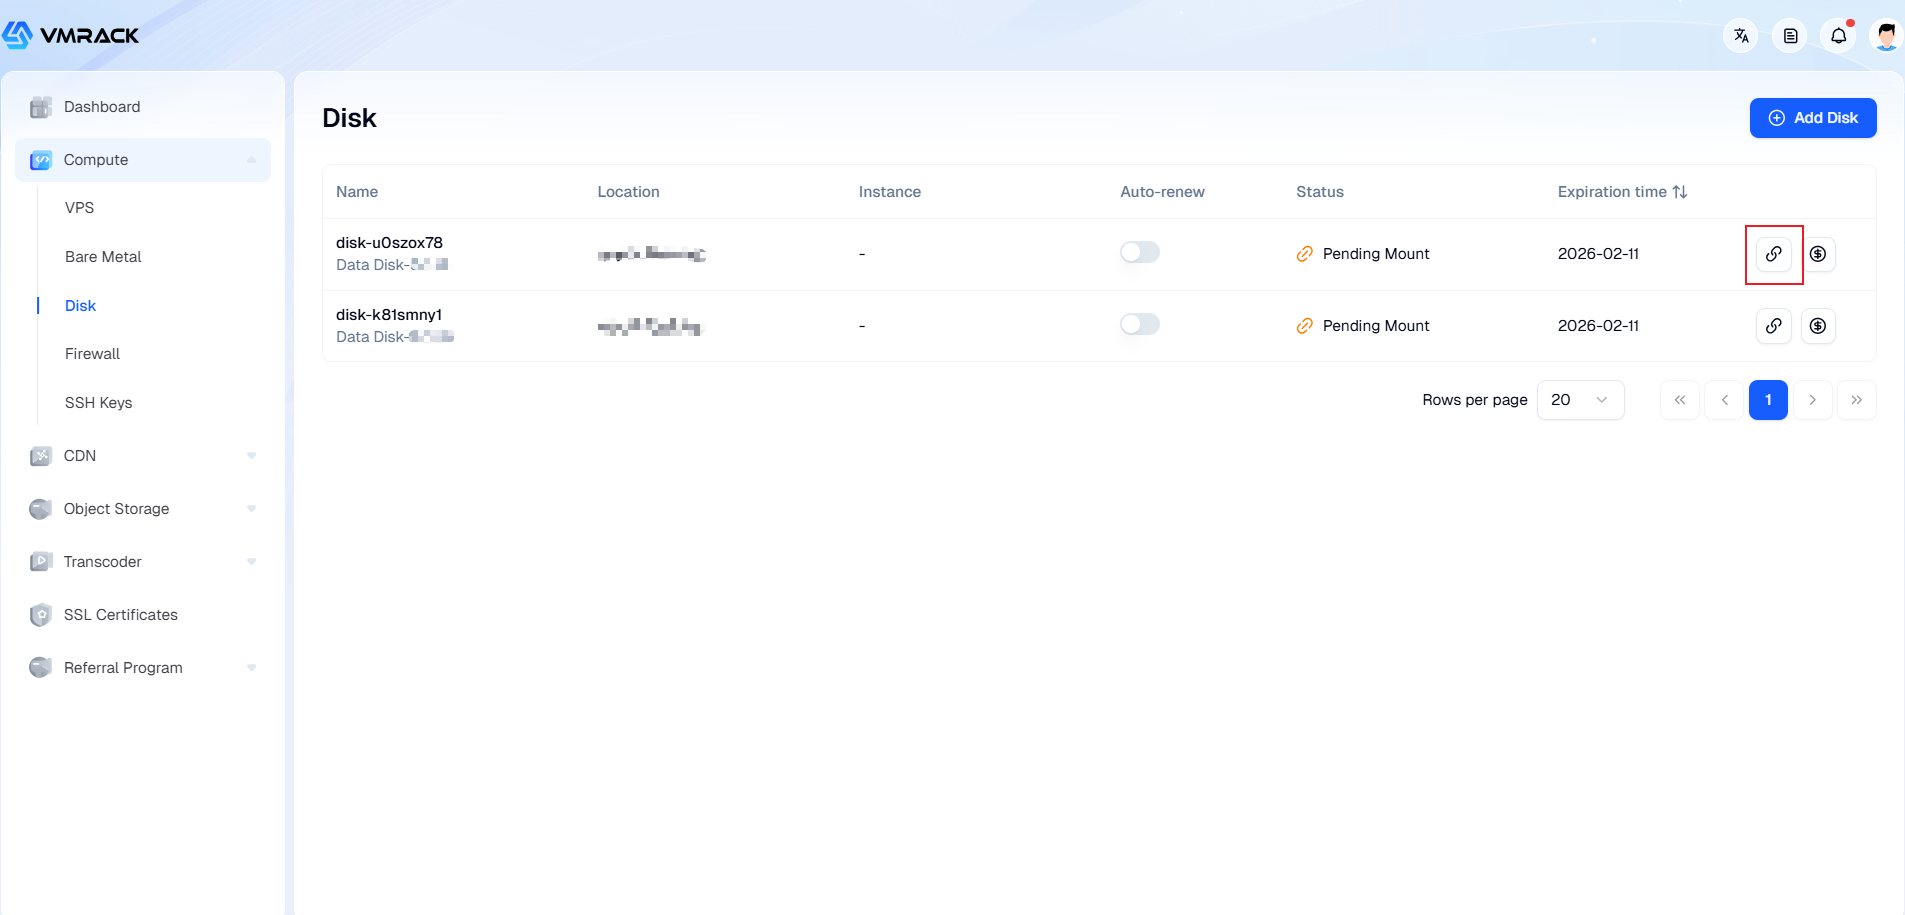
2. For a Disk with the status "Available", click Attach in the operations column on the right, as shown in the image below:
3. In the Attach Disk dialog that appears, select the target VPS instance.
Uninstall Disk
When you need to attach a Disk (configured as a data disk) to a different VPS, you can proactively uninstall it from its current instance and then attach it to another one. Uninstalling a Disk does not erase the data stored on it.
1. Log into the console and navigate to the Disk list.
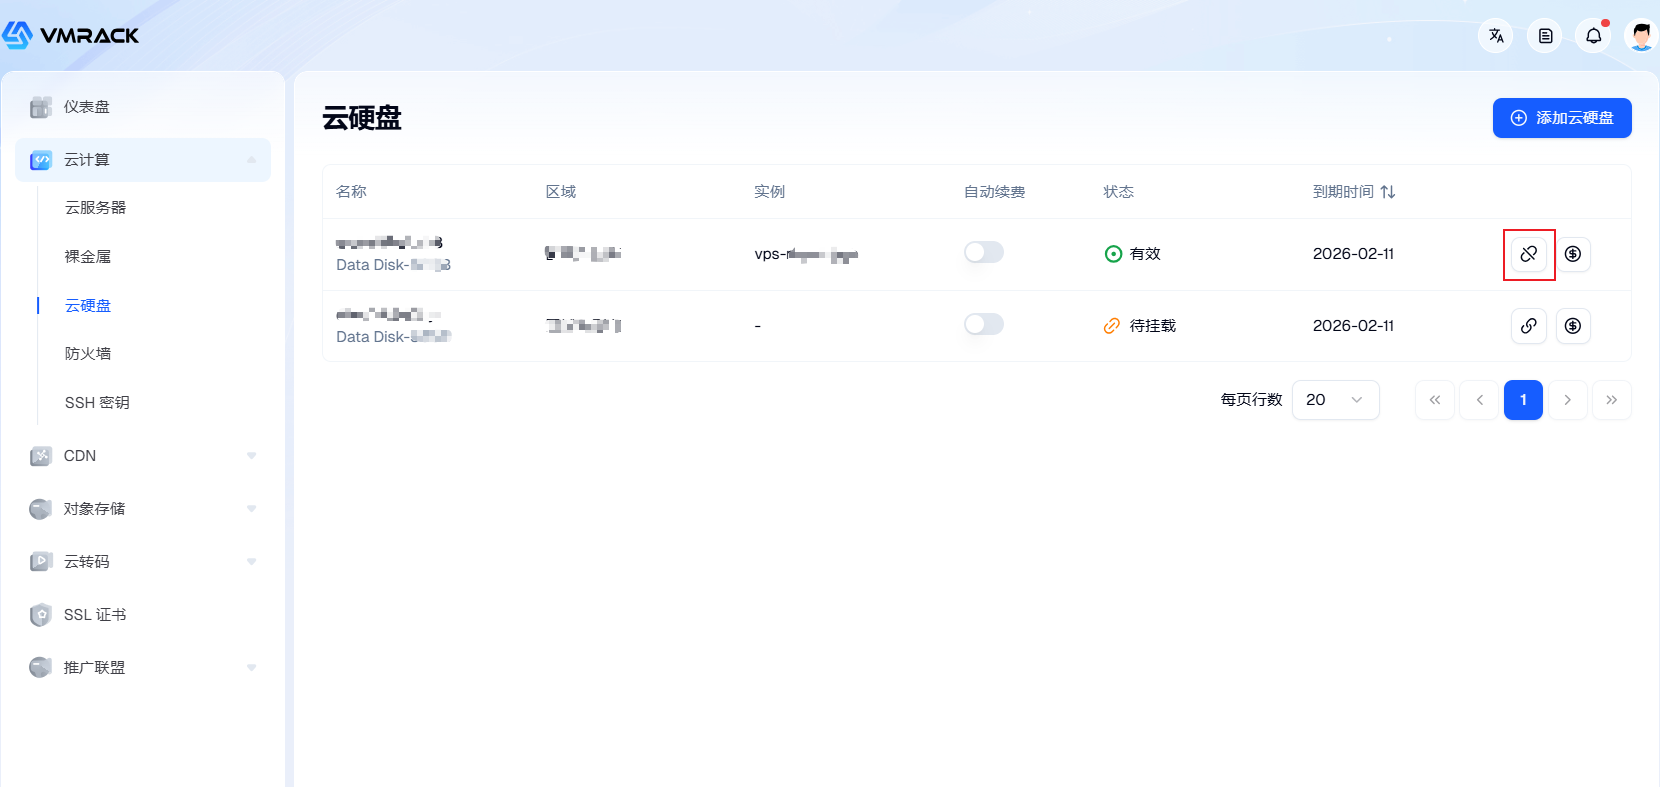
2. For a Disk that is currently attached, click Uninstall in the operations column on the right, as shown in the image below:
3. In the confirmation dialog that appears, click Confirm.
Create a Snapshot
Snapshots are only supported for instance system disks. A Snapshot is a full, usable copy of a system disk at a specific point in time. If the original system disk encounters issues, you can use a Snapshot to quickly restore it to a previous, healthy state. It is highly recommended to create a Snapshot before making significant changes to your instance, allowing for fast data recovery if the changes fail.
1. Log into the console, navigate to your instance, and enter its details page.
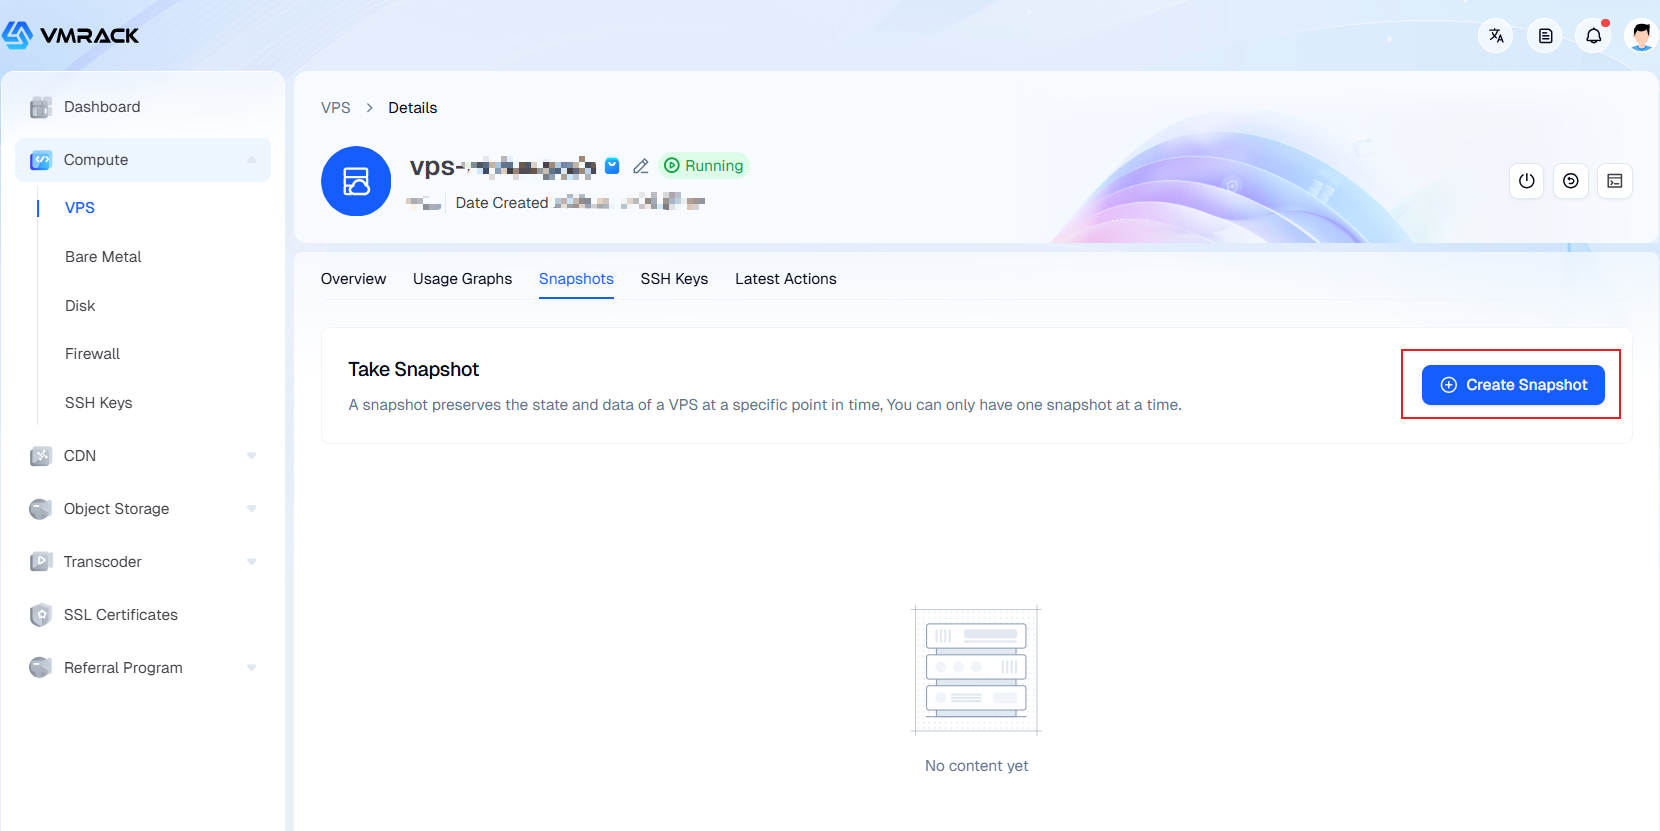
2. Go to the Snapshots section and click "Create Snapshot", as shown in the image below:
3. In the Create Snapshot dialog, set the Retention Period and complete the payment.
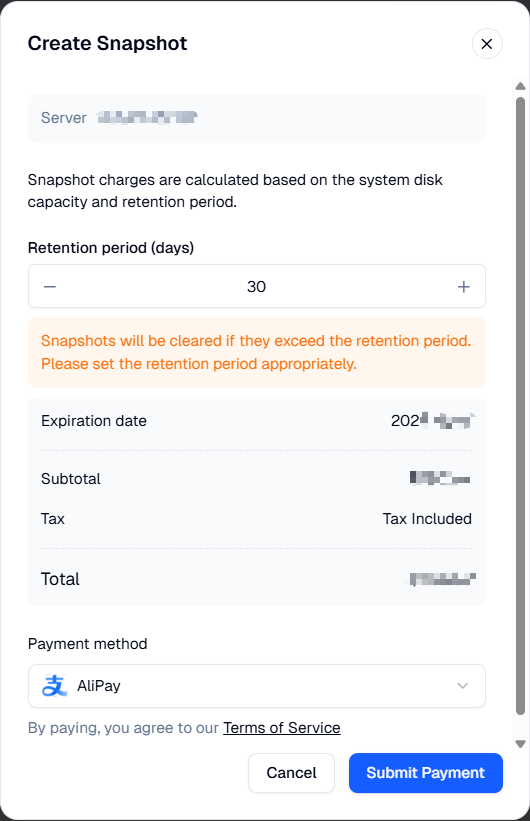
A Snapshot's lifecycle is determined by the retention period you set upon creation. It will be automatically deleted upon expiry. Operations like "renewing" or "extending" a Snapshot's retention period are currently not supported.
Please plan your retention periods carefully based on the importance of your data and your backup strategy, setting a sufficient number of days.
Restore Snapshot
When data on an instance's Disk is lost due to reasons such as accidental deletion, modification, or virus infection, you can use a Snapshot of that Disk to perform a restore. This recovers the Disk's data to the state it was in when the Snapshot was created.
1. Log into the console, navigate to your instance, and enter its details page.
2. Go to the Snapshots section. In the snapshot list, locate the desired Snapshot and click "Restore Snapshot", as shown in the image below:
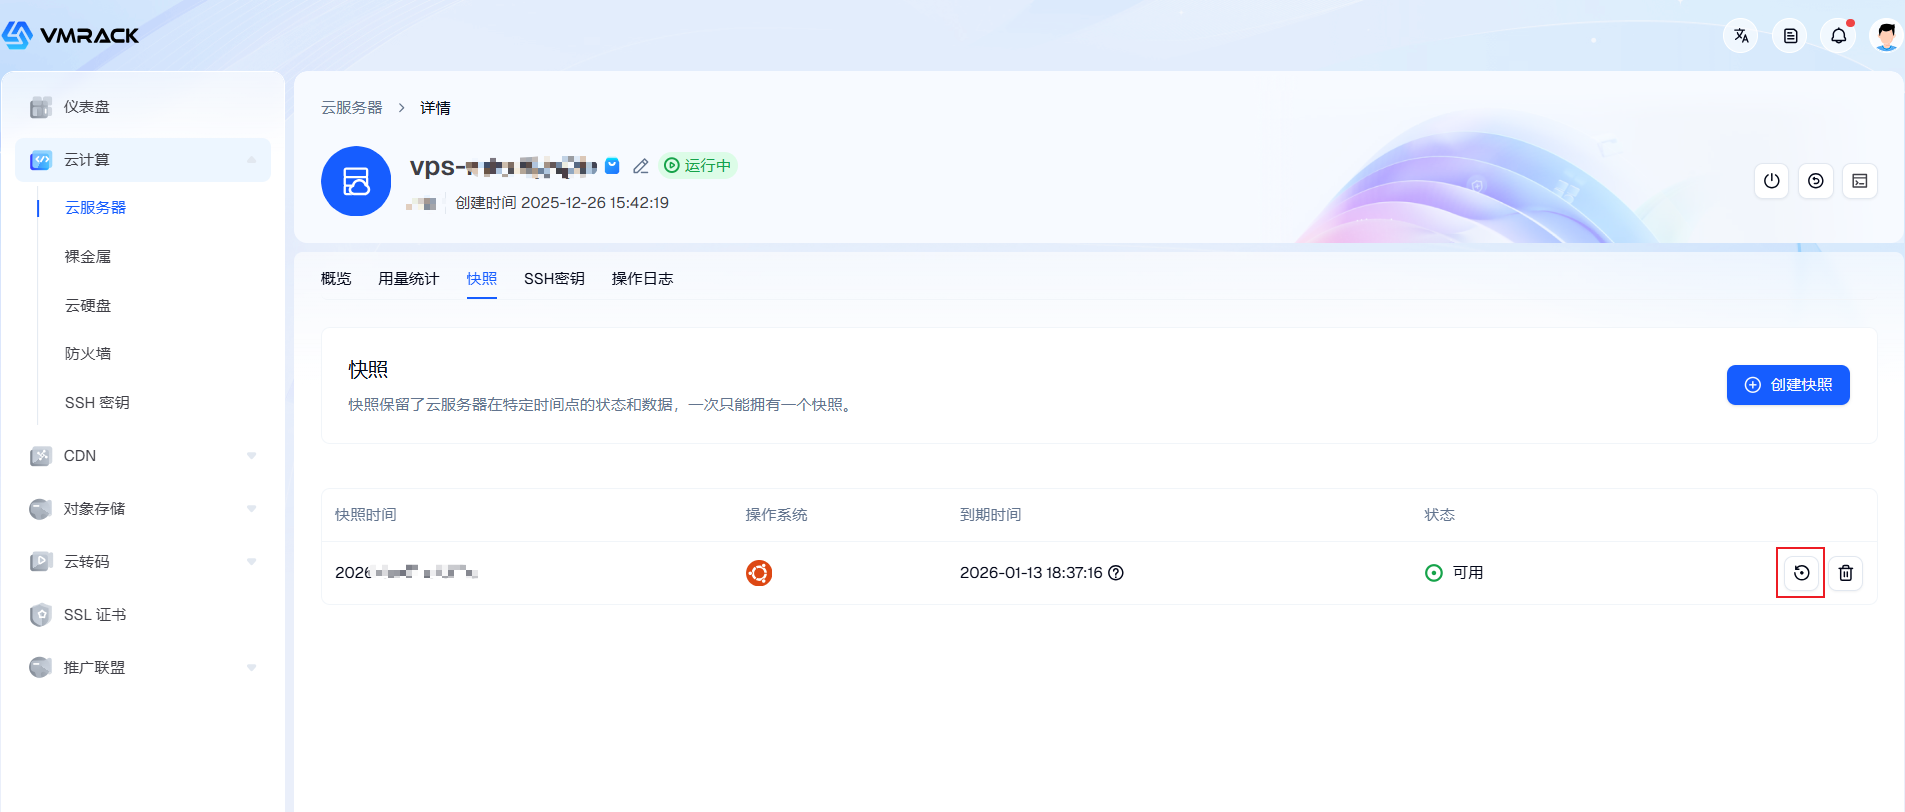
After restoration, all data created after that Snapshot was taken will be lost.
- Products
- VPS Hosting
- VPS HostingUnmetered
- Bare Metal
- GPU Rental
- CDNPublic Beta
- Custom CDN
- Object StoragePublic Beta
- TranscoderPublic Beta