
Network and Security
This document guides you through managing network access and security policies for your Bare Metal, including public IP management and SSH keys.
Public IP
A Public IP is the unique address assigned to your instance for communicating with the Internet. It is allocated when you purchase a Bare Metal.
View Public IP
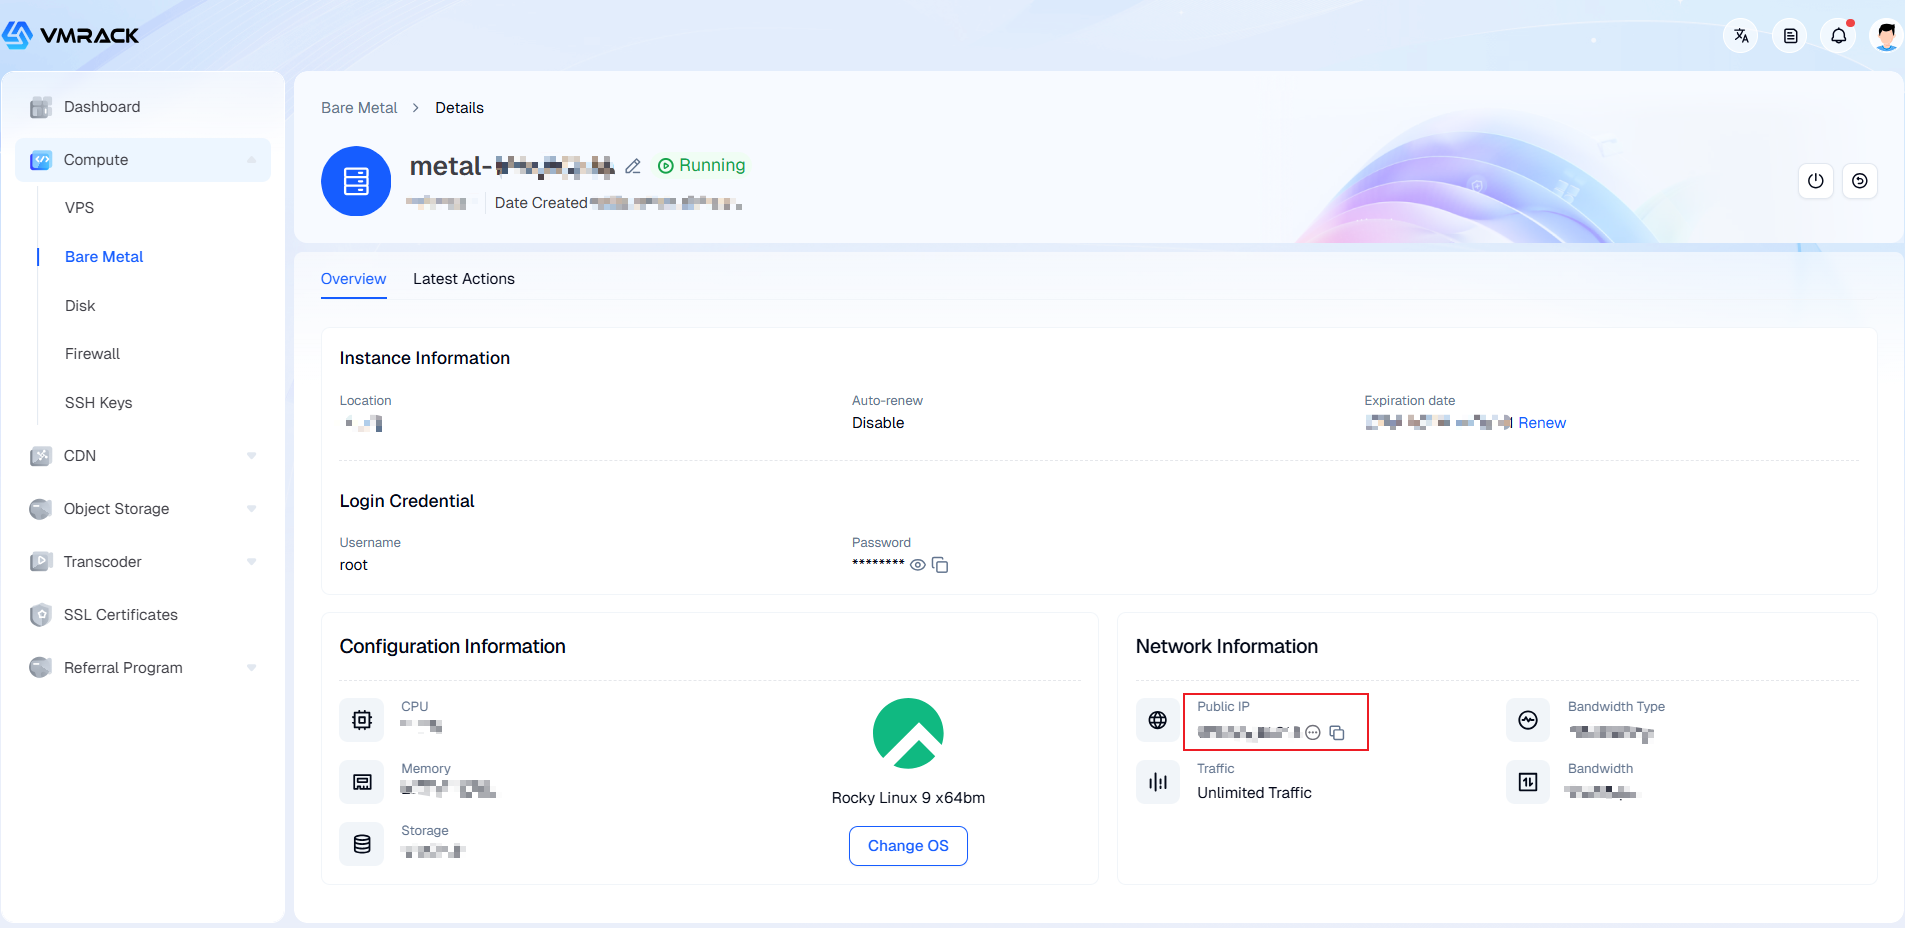
The Public IP address of an instance is displayed in the Overview section of the instance details page. You can also view it from the instance list.
SSH Keys
An SSH key pair is a more secure and convenient method for remote login authentication compared to passwords, especially suitable for Linux instances. It utilizes asymmetric encryption technology, consisting of a public key and a private key.
Public Key: Placed inside the cloud server instance. Used to verify the private key and can be made public.
Private Key: Kept locally by you and must be strictly confidential. Used to log in to the instance and prove your identity.
Create an SSH Key
1. Log in to the SSH Keys list in the console.
2. Click "Create SSH Key", as shown in the image below:
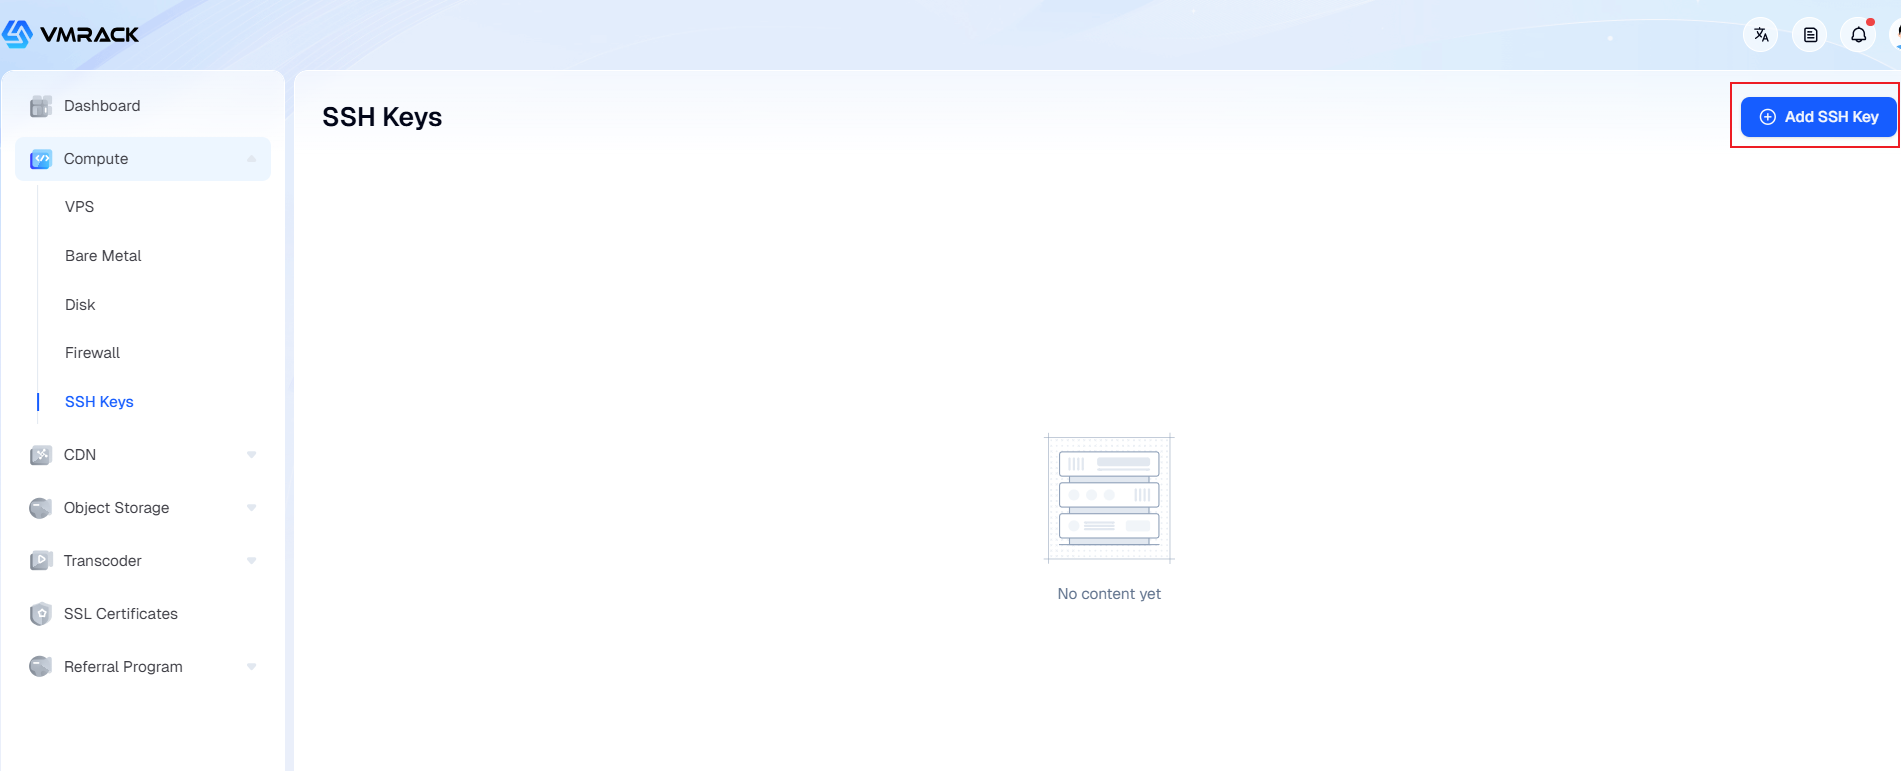
3. In the "Create SSH Key" dialog that appears, enter a key name and click "Save".
4. Upon successful creation, the private key file (usually in .pem format) will be automatically downloaded by your browser. Please save it to a secure local location.
The private key file cannot be recovered if lost. Never send it directly via messaging tools or upload it to public code repositories.
Import Existing Public Key
1. Log in to the SSH Keys list in the console.
2. Click "Create SSH Key" and select "Import Key".
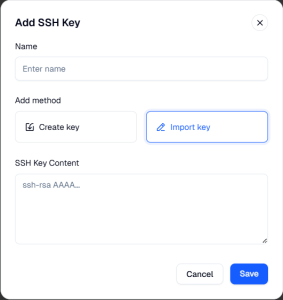
3. Paste the contents of your local public key file and assign it a name.
Bind SSH Key to Instance
Bind during instance creation:
In the "Login Credentials" configuration step, select "SSH Key", then choose the key pair you have already created from the list.
Bind to an existing instance:
Go to the details page of the target instance.
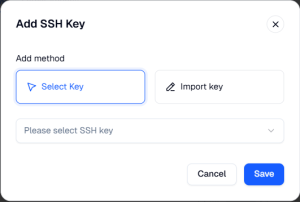
On the "SSH Keys" page, click "Add SSH Key", then select the key pair you have already created from the list.
Log in Linux Instance Using an SSH Key
Ensure that the firewall associated with the instance allows traffic on TCP port 22 (the default SSH port).
Log in via Local Terminal/SSH Client
1. In a local terminal (Linux/macOS) or using an SSH client (such as PuTTY, which may require converting the private key format), connect with the following command:
bash
ssh -i /local/path/to/your/private-key.pem root@<instance-public-ip>
2. If this is the first connection, the system may ask you to confirm the host's authenticity. Type yes to proceed.
- Products
- VPS Hosting
- VPS HostingUnmetered
- Bare Metal
- GPU Rental
- CDNPublic Beta
- Custom CDN
- Object StoragePublic Beta
- TranscoderPublic Beta