
Quick Start Guide
Process Flow:
Register Account --> Activate Service --> Upload File --> Create Task --> Check Result
Login & Preparation
Before using the Transcoder service, you need to have a VMRack account.
Sign up / Log in: Visit the VMRack official website and log in to your account.
Enter Console: After logging in successfully, find the "Transcoder" menu in the product list on the left.
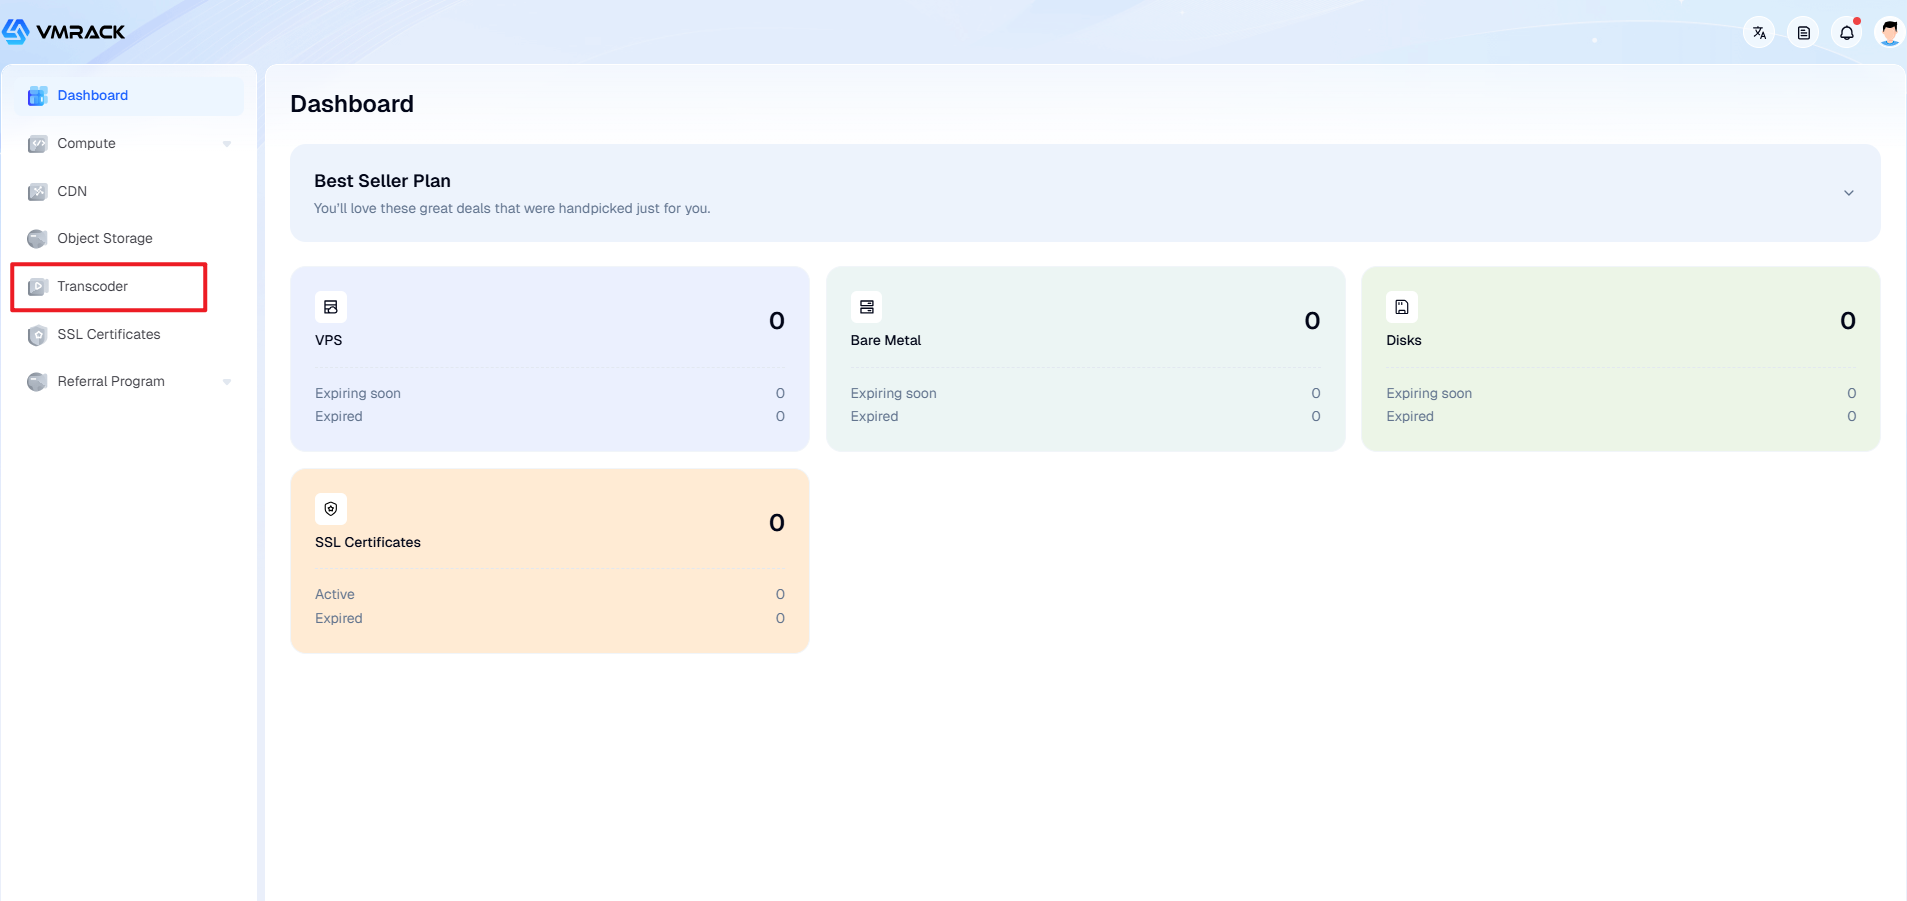
Activate Service
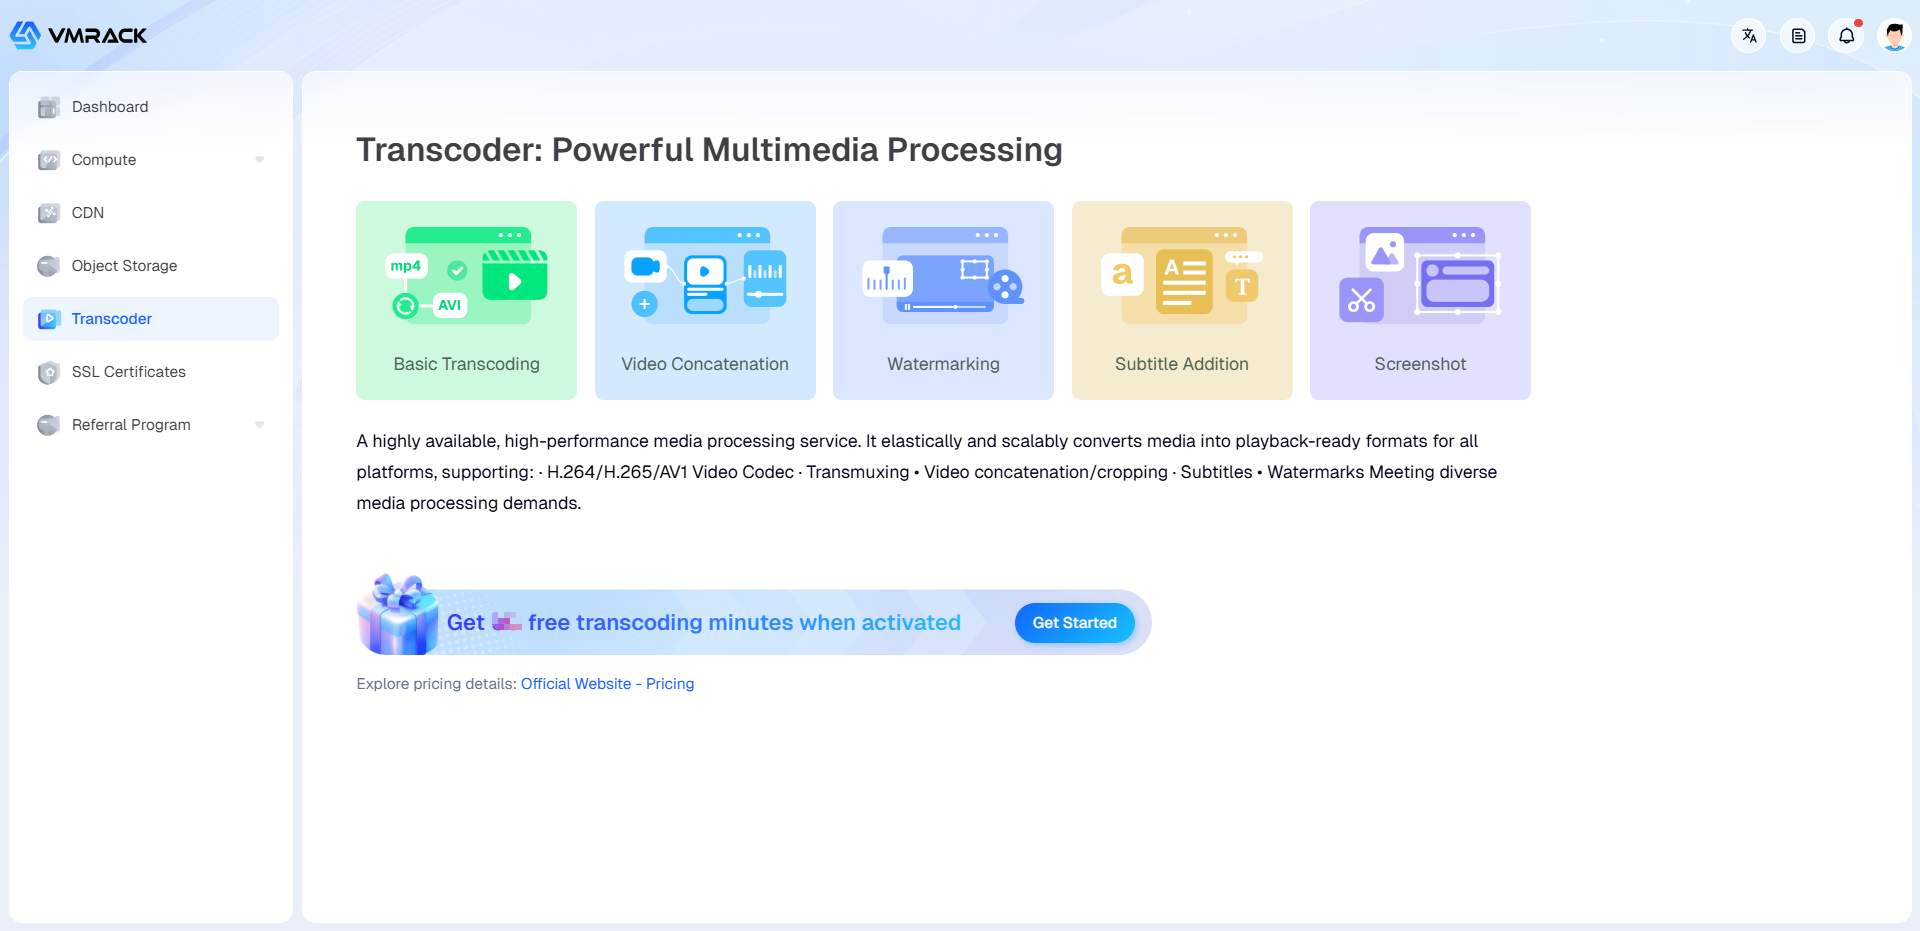
By default, the Transcoder service is inactive. You need to manually activate the service when using the Transcoder feature for the first time.
Click to Enter: Click the " Transcoder" menu, and you will see the service activation guide page.
Activate Now: Click the "Get Started" button on the page.
Note: Activating the service means you agree to the Pay-As-You-Go agreement, Activation itself does not incur charges. Fees are deducted only after you begin using the transcoding service.
Transcoder supports using VMRack Object Storage as the input file source and the output path after transcoding. You need to go to the Object Storage Console to activate the service first.
Transcoder supports using Amazon S3 and S3-compatible storage as input file sources. If needed, please prepare the corresponding S3 storage keys in advance.
Upload and Store Files
Log in to the Object Storage Console, select Bucket List in the left navigation bar, and click Create Bucket.
Enter the Bucket management page, go to the Object List, and Upload File.
Create Transcoding Task
Enter the Task Management menu and click Create Task.
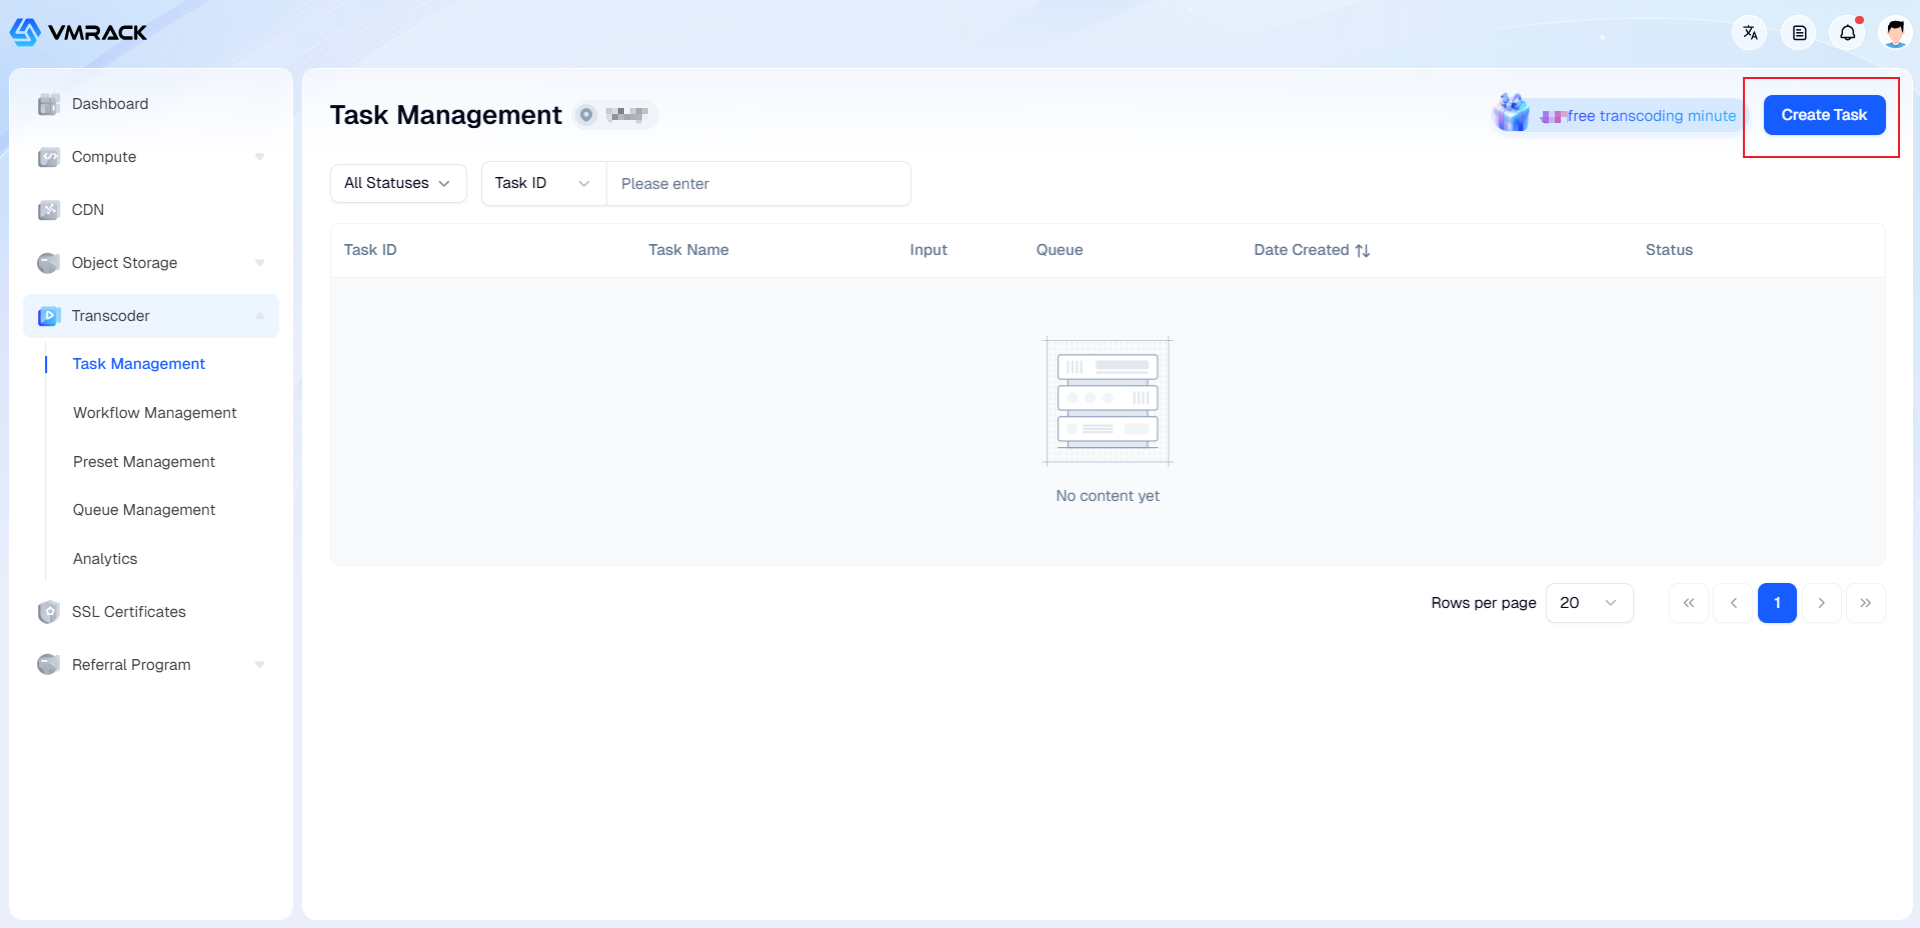
On the Create Task page, configure the Input Source File, Workflow, and specify the Output Path as required.
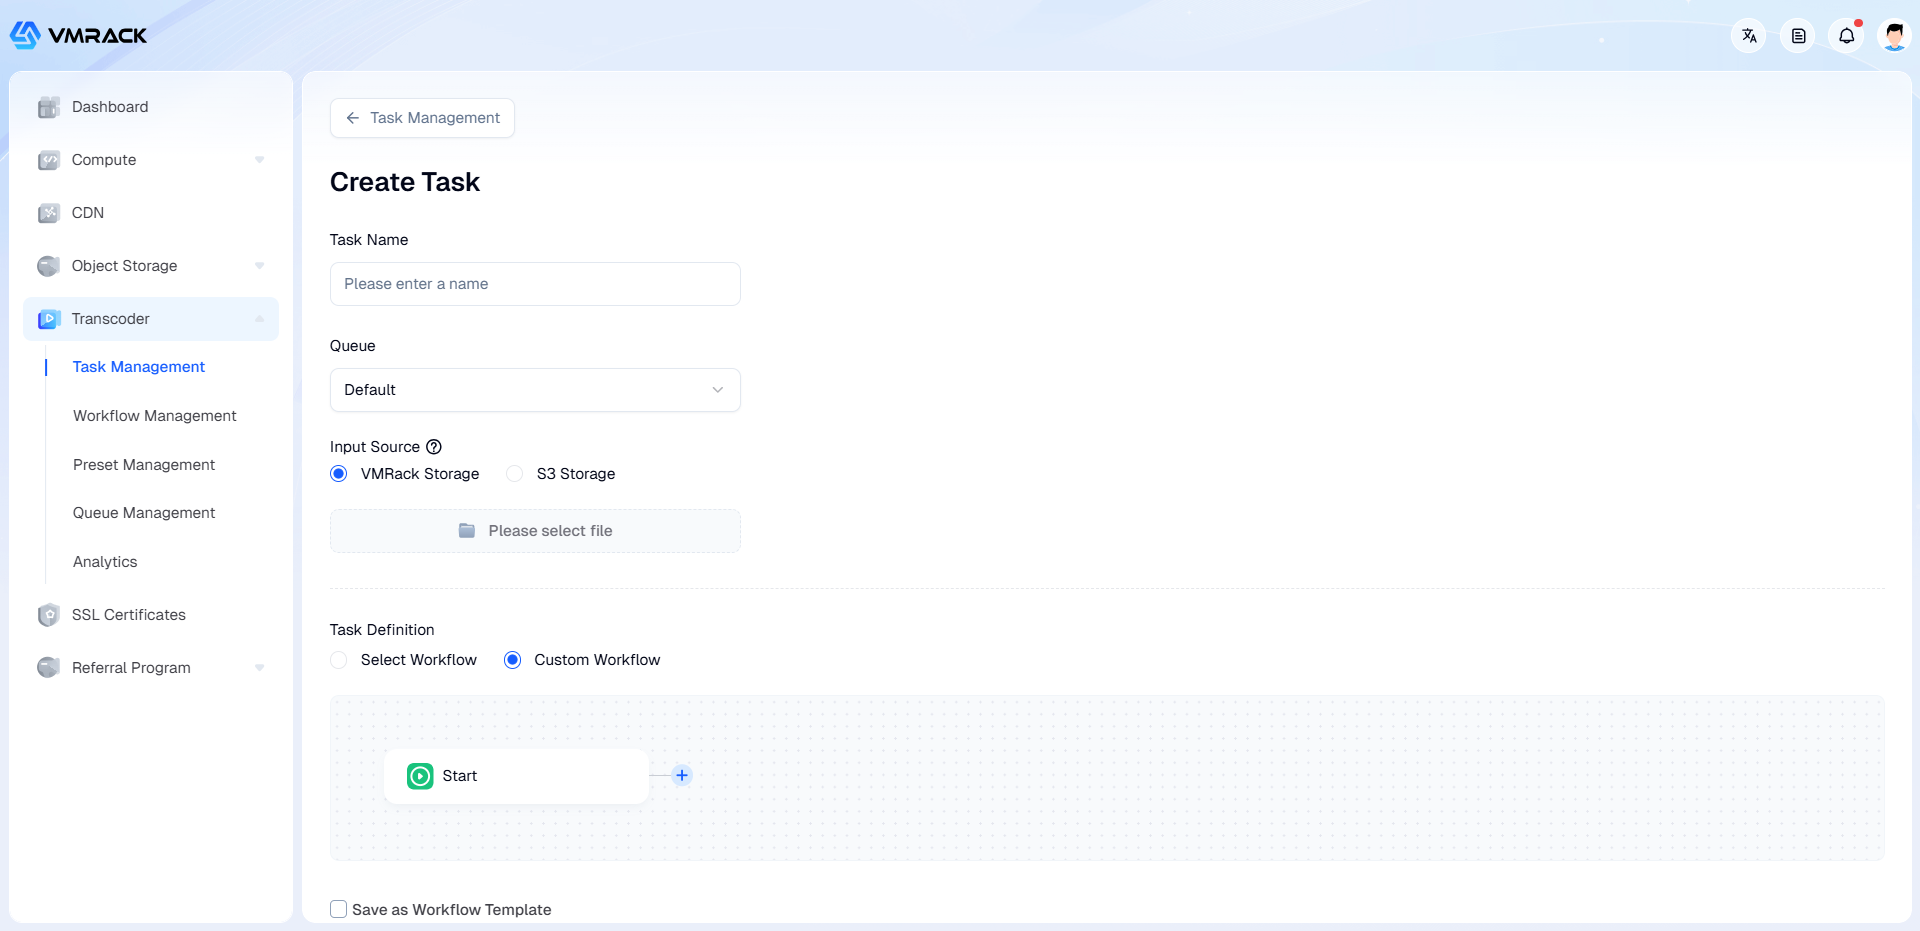
Query Task Results
View the task status and detailed information in the Task List under Task Management in the Transcoder Console.
- Products
- VPS Hosting
- VPS HostingUnmetered
- Bare Metal
- GPU Rental
- CDNPublic Beta
- Custom CDN
- Object StoragePublic Beta
- TranscoderPublic Beta