
Private IP Address
VMRack VPS Private IP can be used for internal communication between VPS instances under the same account and located in the same data center. Data transmission is completed through the private network without generating public bandwidth traffic charges.
Compared with public network communication, private network connections provide higher transfer speeds, lower network latency, and improved security. They are suitable for various scenarios such as database synchronization, distributed cluster deployment, application service communication, and file sharing.
Features
1. Private IP Address
Each VPS supports the assignment of a private IP address for communication between VPS instances. Private IP addresses are not publicly accessible, and all data transmission is completed through the internal network without passing through public network routes.
Example
VPS | Public IP Address | Private IP Address |
|---|---|---|
VPS-01 | 38.*.*.10 | 10.0.0.10 |
VPS-02 | 38.*.*.10 | 10.0.0.11 |
VPS instances can directly communicate with each other using private IP addresses.
2. Communication Rules
By default, VPS instances under the same account and located in the same data center can communicate with each other through private IP addresses. Private network communication does not consume public bandwidth and typically does not generate public traffic charges.
Network communication between different data centers is isolated by default and direct private network communication is not supported.
3. Private Network
VMRack is built on a high-speed internal network architecture, providing a low-latency and highly stable environment for private network communication. It is suitable for internal communication scenarios such as data synchronization, cluster communication, and database access between servers.
Usage Guide
After enabling the private IP feature, VPS instances can communicate with each other through private IP addresses without generating public traffic charges, while maintaining high speed and security. The following steps explain how to enable the private network feature on your VPS.
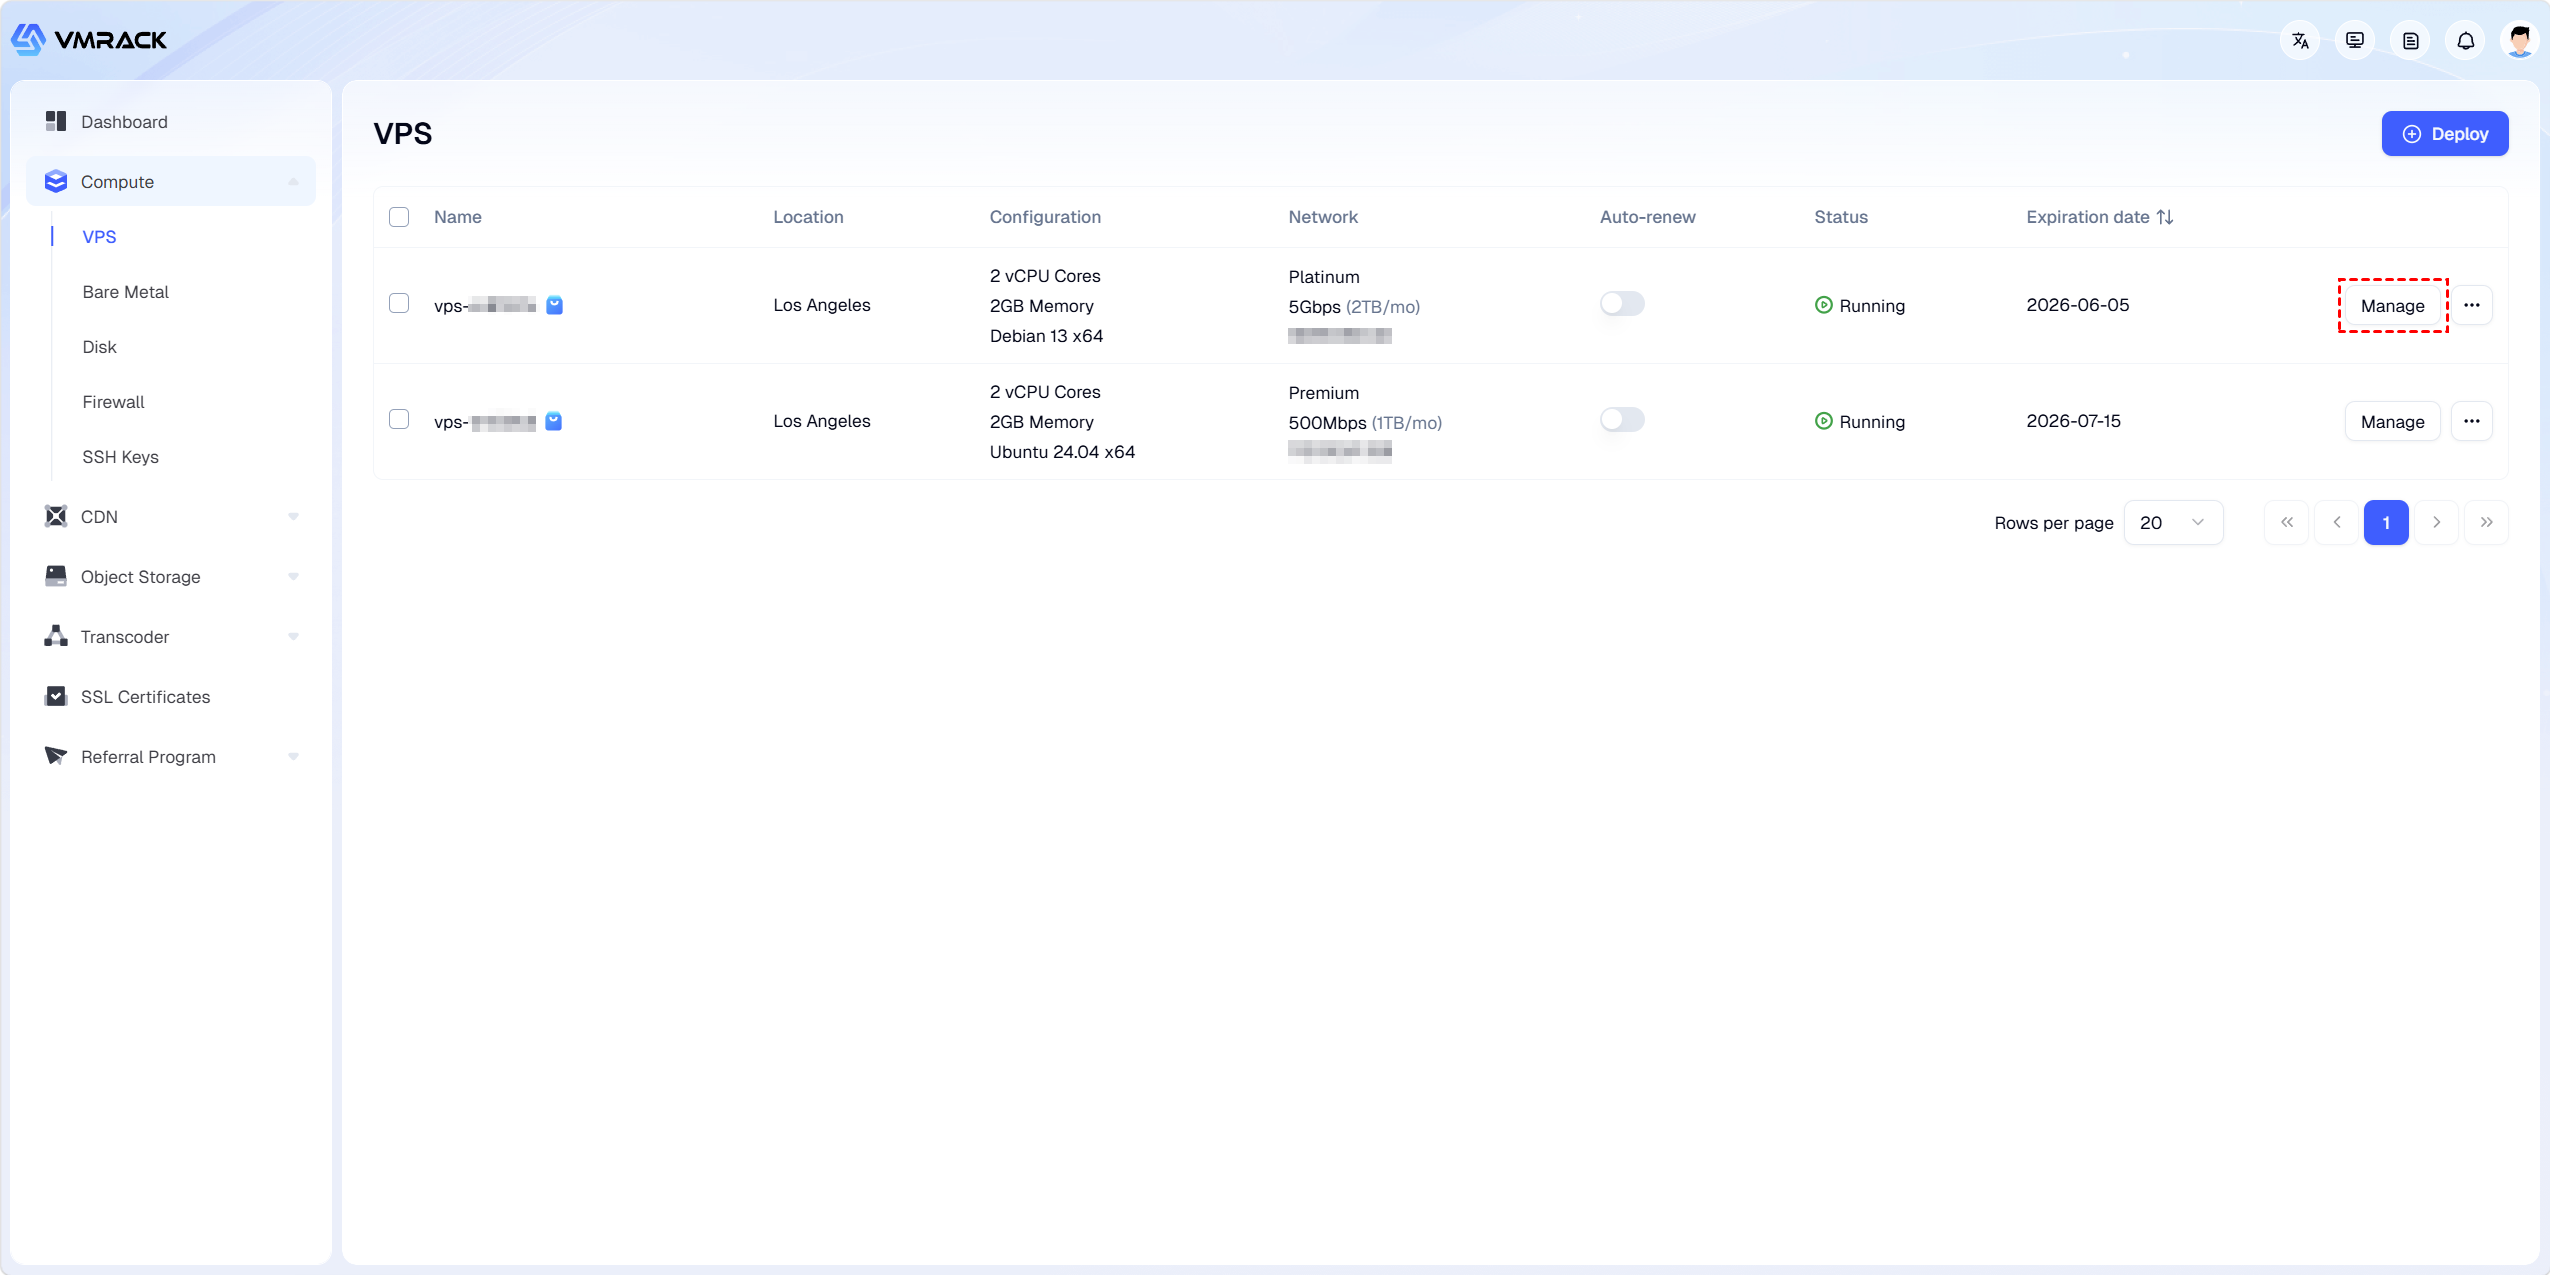
1.First, log in to your account and enter the control panel. From the left-side menu, select “Compute” > “VPS”, then choose the VPS instance for which you want to enable the private IP address and click “Manage”.
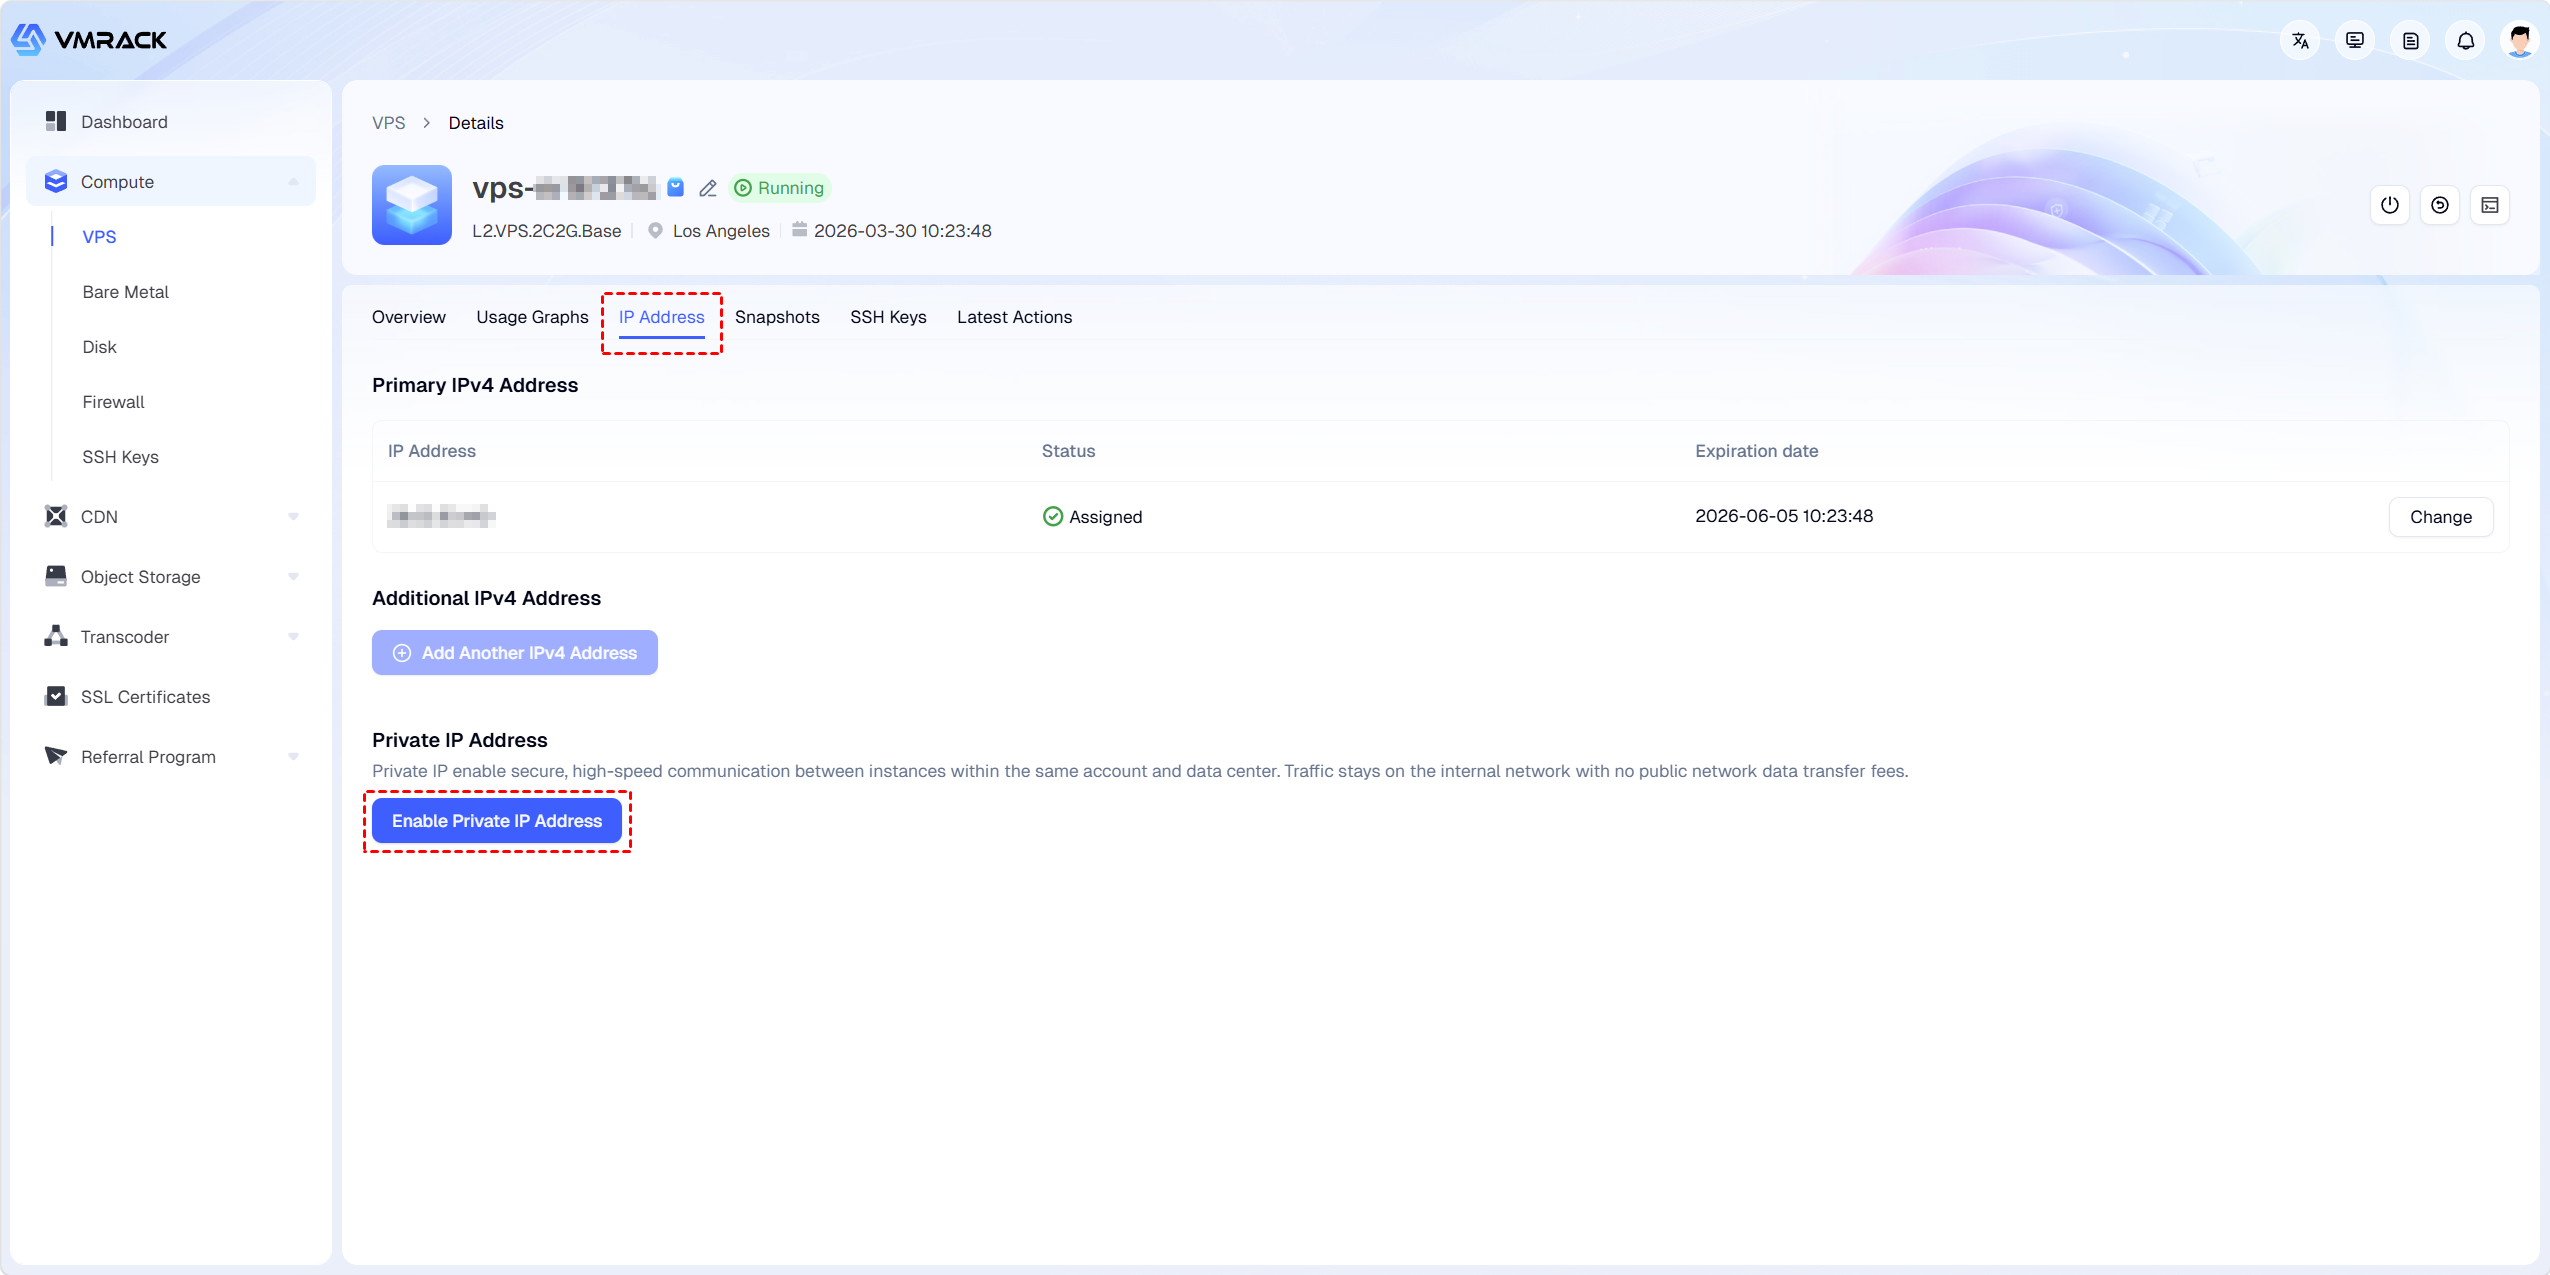
2.After entering the VPS details page, select “IP Address”, then click “Enable Private IP Address” under the private IP section.
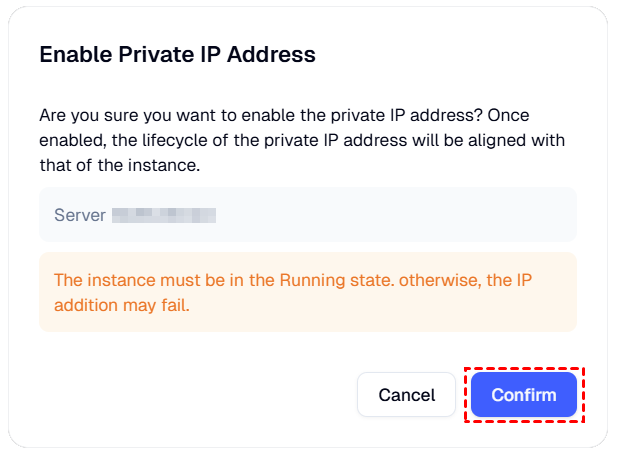
3.In the confirmation dialog, verify that the VPS information is correct, then click “Confirm”.
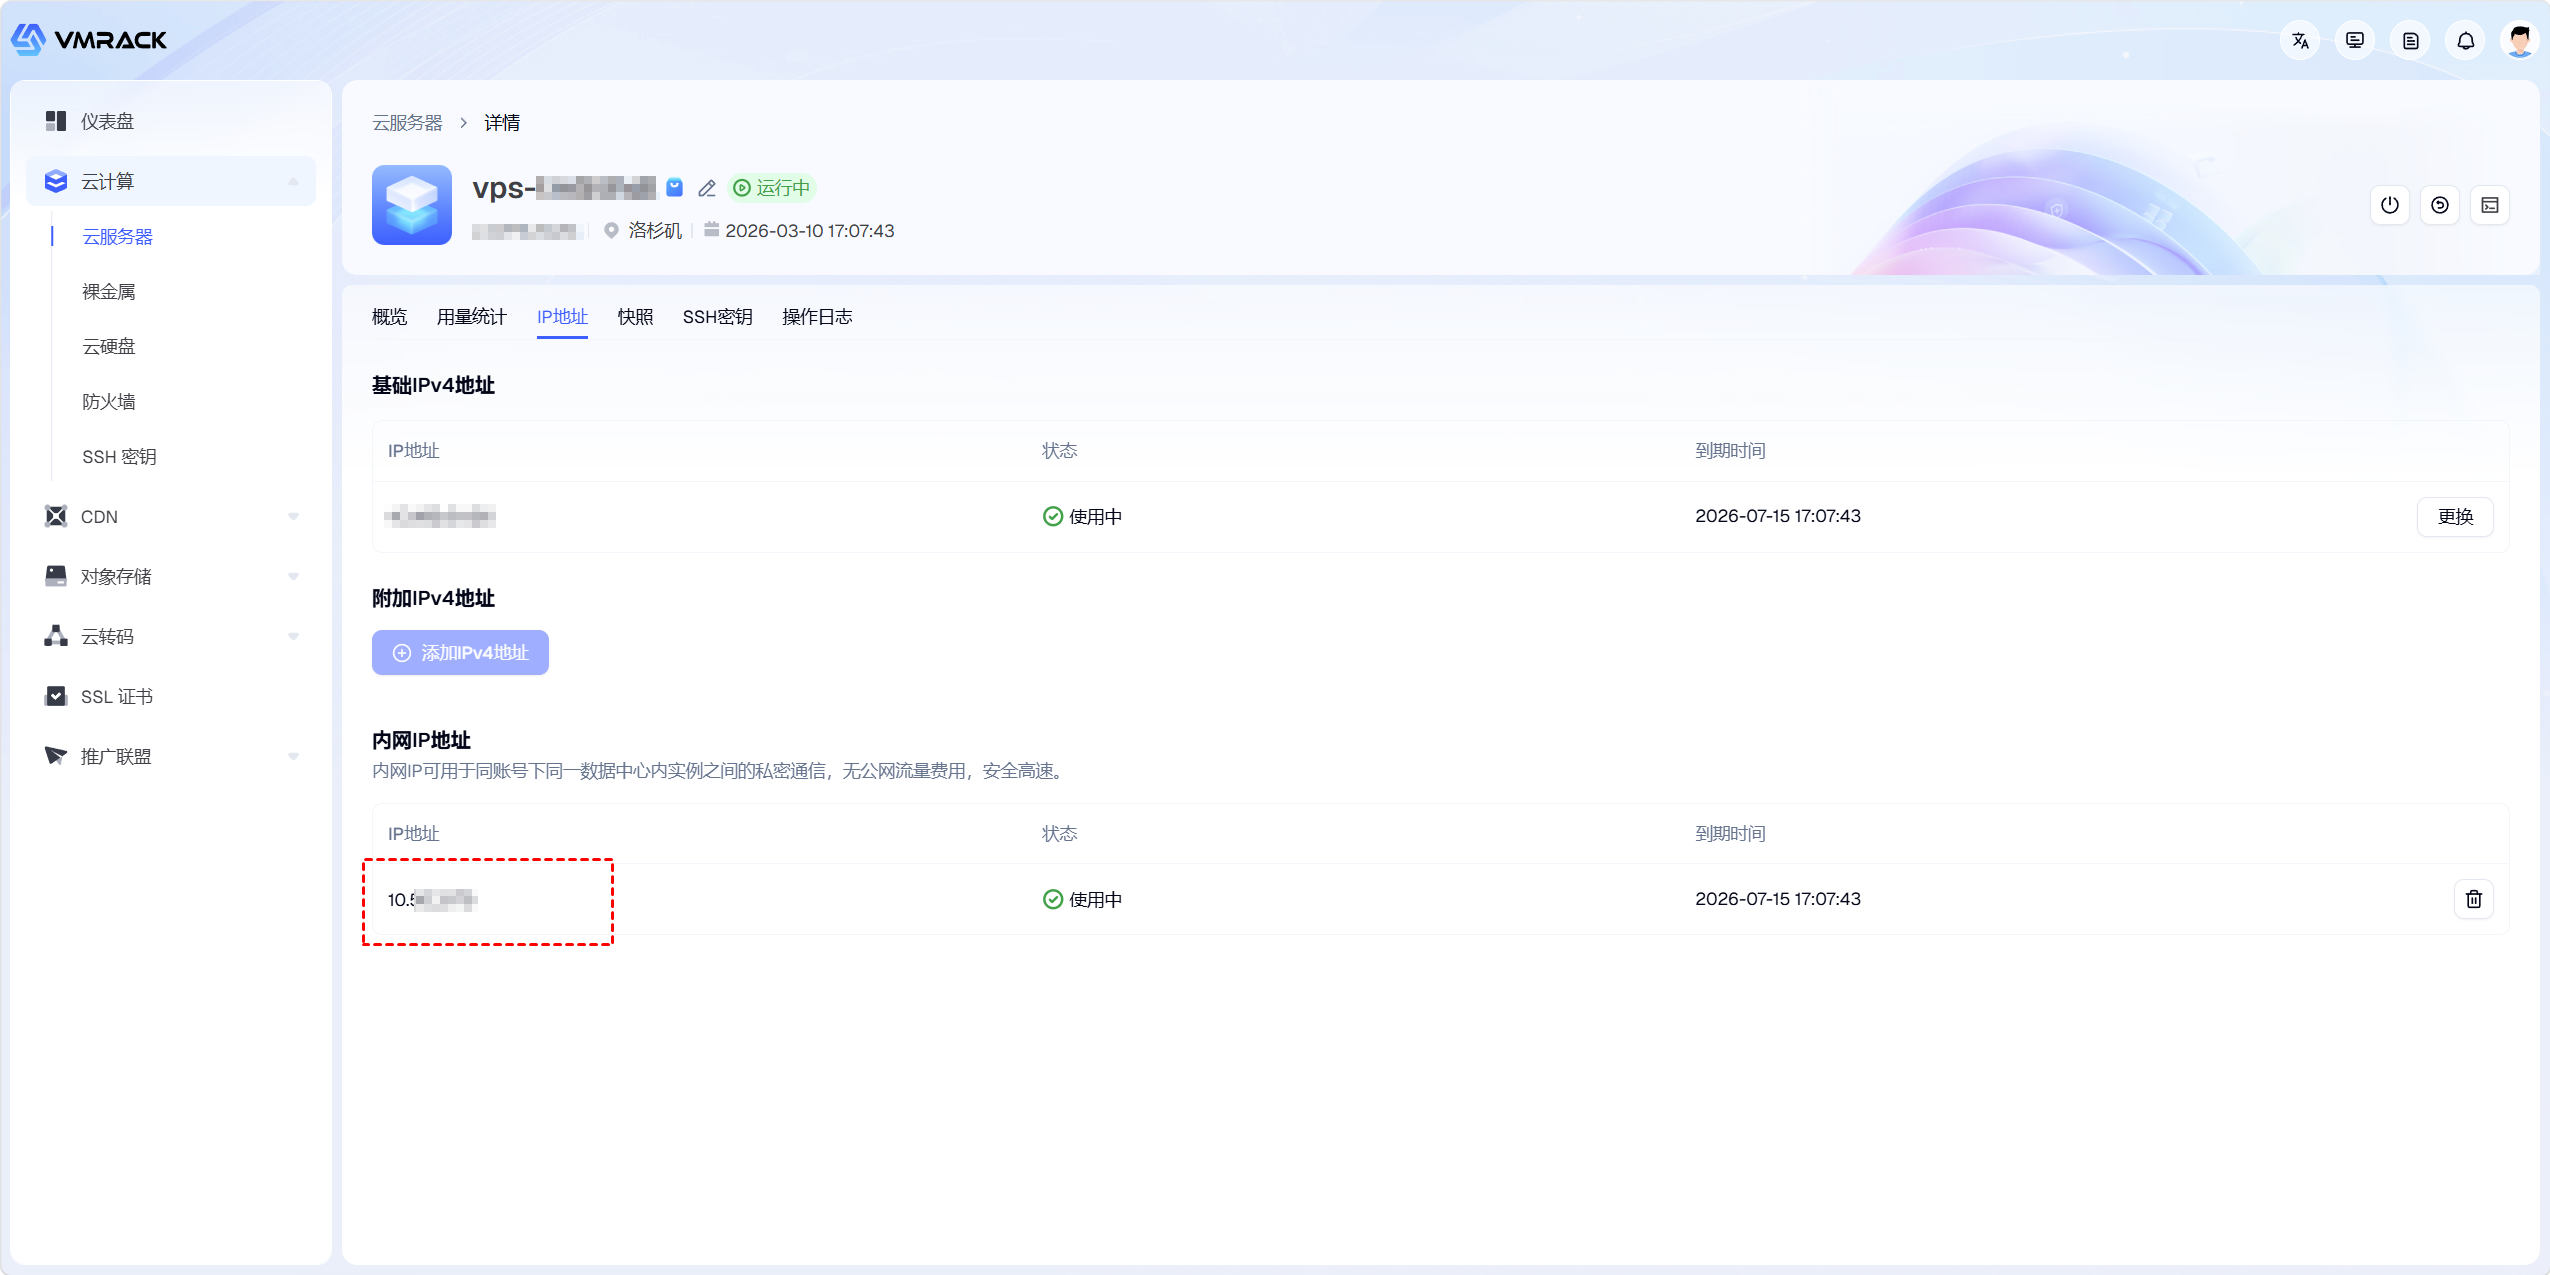
4.The system will automatically assign a private IP address to your VPS, as shown below.
FAQ
1. Is private network traffic charged?
Private network traffic is free of charge and does not generate public traffic fees.
2. Can VPS instances in different regions communicate over the private network?
No. Networks between different data centers are isolated by default, and direct private network communication is currently not supported.
3. Why is the private network unreachable or unable to ping?
Please check the following configurations:
Whether the private network feature is enabled
Whether the security group rules allow the required ports
Whether the operating system firewall is blocking the connection
Whether both VPS instances are located in the same data center
4. Does private network communication consume public bandwidth?
No. Private network communication is independent of public bandwidth and does not consume public bandwidth resources.
- Products
- VPS Hosting
- VPS HostingUnmetered
- Bare Metal
- GPU Rental
- CDNPublic Beta
- Custom CDN
- Object StoragePublic Beta
- TranscoderPublic Beta