
Network and Security
This document guides you through managing network access and security policies for your VPS, including firewall rule configuration, bandwidth/data transfer, and Public IP management.
Public IP
A Public IP is the unique address assigned to your instance for communicating with the Internet. It is allocated when you purchase a VPS.
View Public IP
The Public IP address of an instance is displayed in the Overview section of the instance details page. You can also view it from the instance list.
Change public IP
If you need to change your Public IP address due to reasons such as the IP being under attack, accidentally blocked, or business requirements, you can follow these steps:
1. Log into the console, navigate to the instance list, and enter the instance details page.
2. On the Overview page of the instance details, click "Change" next to the Public IP.
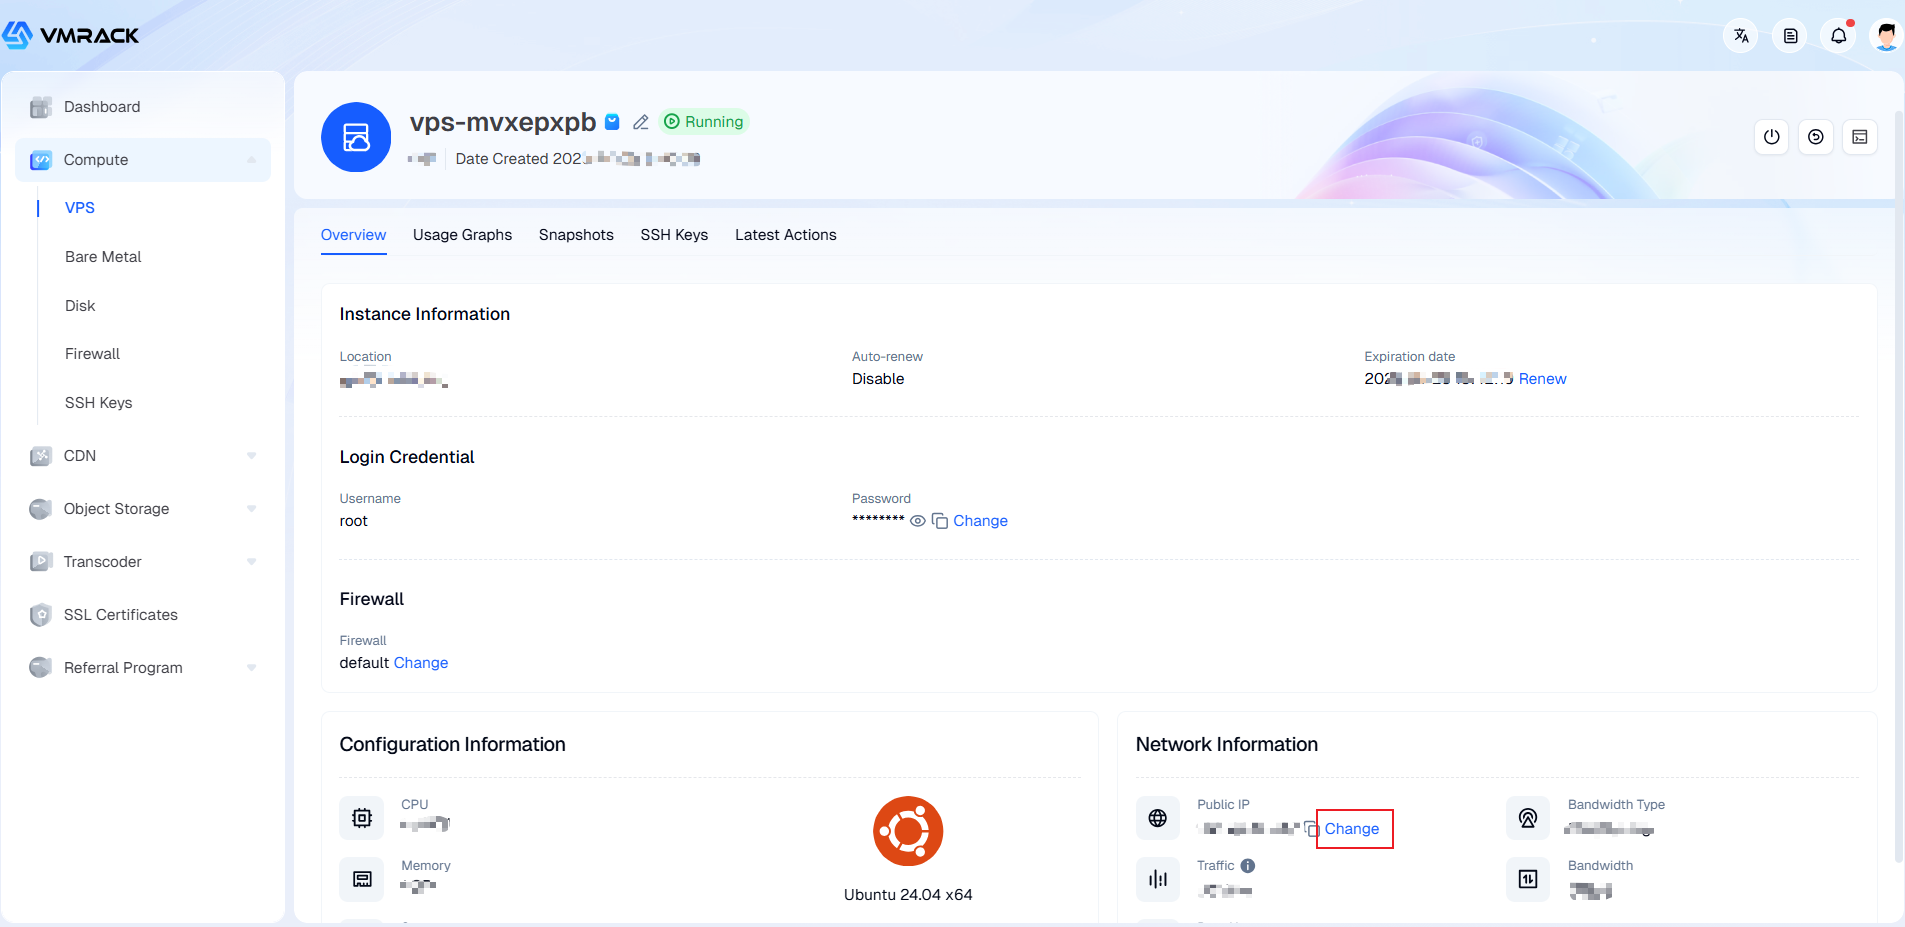
3. In the Change IP dialog that appears, complete the payment.
Changing an IP requires payment equivalent to one month's IP fee.
After the change, the original IP cannot be recovered. The instance will restart during this process. Please proceed with caution.
Add Data
For VPS instances using the "Metered Data Transfer" model, their network speed depends on the monthly fixed data transfer package you purchased. When the data transfer within a billing cycle is exhausted, the public bandwidth will be throttled to a lower speed. At this point, you can purchase "Add Data" to restore normal network speed.
1. Log into the console, navigate to the instance list, and enter the instance details page.
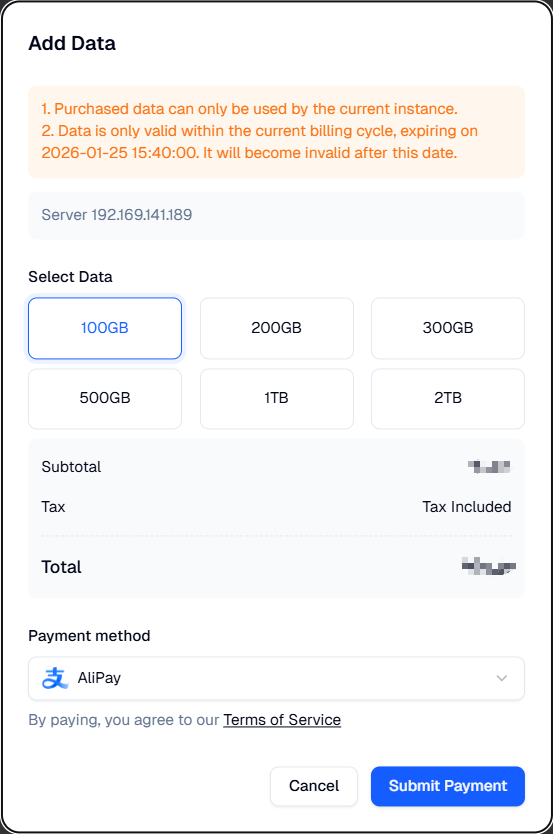
2. On the Overview page of the instance details, click "Add Data".
3. In the Add Data dialog that appears, select the data transfer package you need and complete the payment.
Firewall
A Firewall is a virtual firewall that controls network traffic to and from your instance by configuring inbound and outbound rules. It serves as a crucial means of network security isolation.
Default Firewall: When you purchase an instance, the system provides a default firewall. It typically pre-allows common management ports such as TCP 22 (SSH), 80 (HTTP), and 443 (HTTPS) for your convenience in establishing initial connections.
Create Firewall
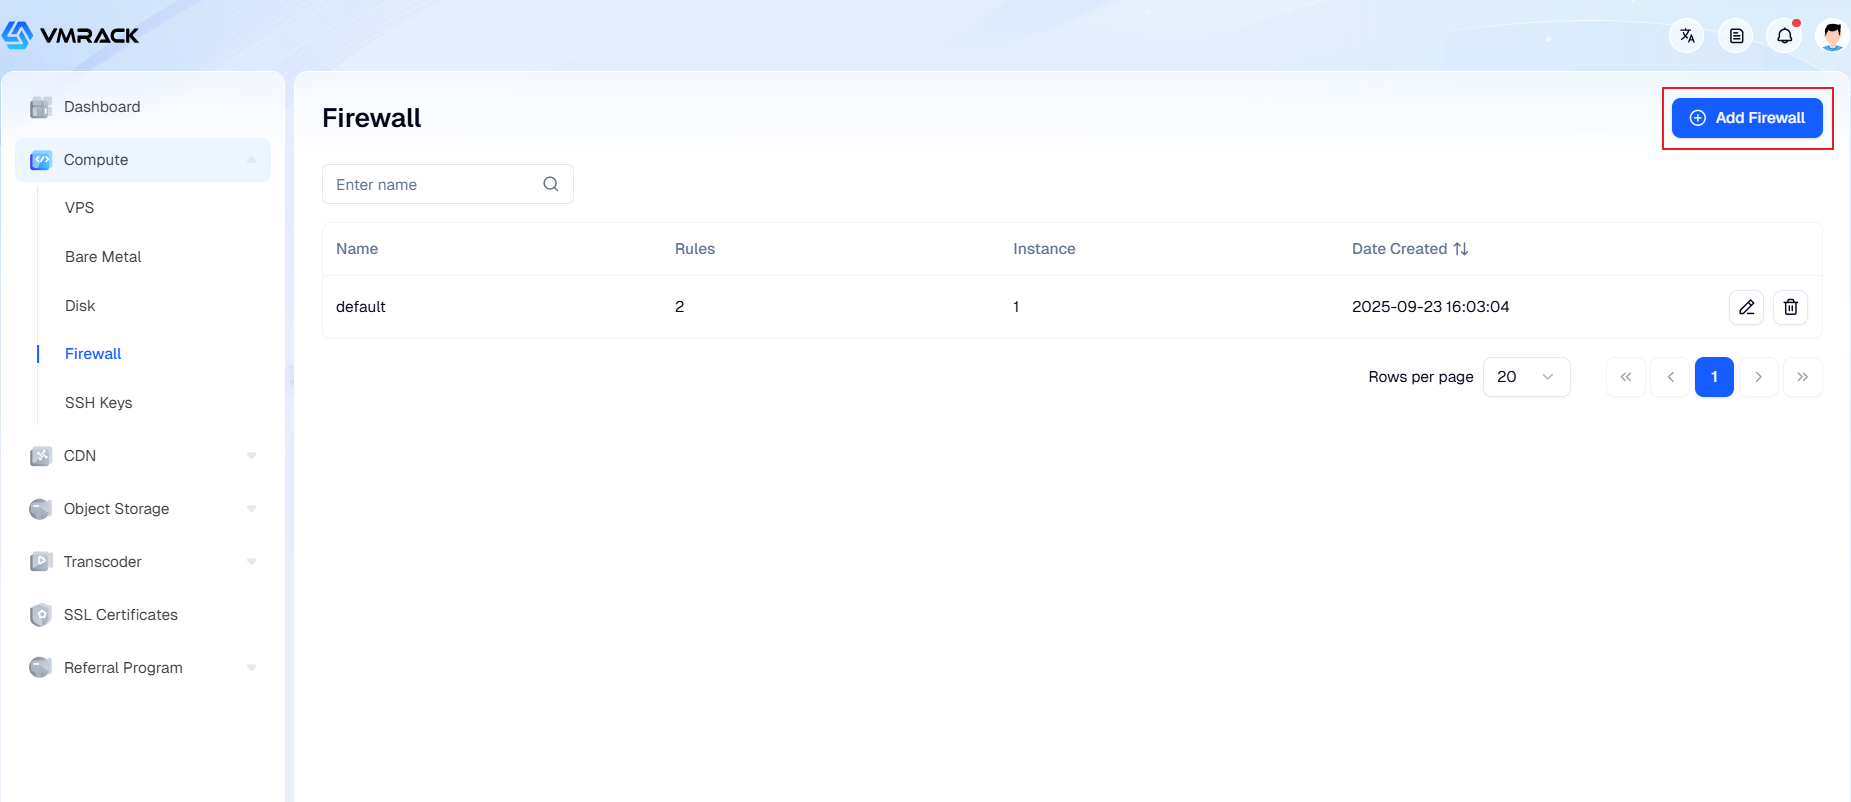
1. Log into the console and navigate to the Firewall list.
2. Click "Create Firewall", as shown in the image below:
3. In the firewall list, click "Edit" next to the desired firewall to enter its configuration page, where you can set up outbound and inbound rules.
Rule Direction:
Inbound Rules: Control traffic from external networks accessing your instance (e.g., SSH logins, web service requests).
Outbound Rules: Control traffic from your instance actively accessing external networks (typically, all outbound traffic is allowed by default).
Configuration Item | Description |
|---|---|
Policy | Supports the "Allow" access policy. |
Protocol Type | TCP, UDP, ICMP (IPv4), HTTP (80), HTTPS (443), and SSH (22). |
Port Range | The port(s) opened for an application or protocol. Port value range (1-65535). Supports: • Single port: 80 • Port range: 80/90 • All ports: -1/-1 |
Source | In an inbound rule, matches the source address of the traffic. Supported formats: • Single IP: e.g., 203.0.113.0 • CIDR block: e.g., 203.0.113.0/24 • All IPs: 0.0.0.0/0 |
Destination | In an outbound rule, matches the destination address of the traffic. Supported formats: • Single IP: e.g., 203.0.113.0 • CIDR block: e.g., 203.0.113.0/24 • All IPs: 0.0.0.0/0 |
Common Ports
Port | Service | Description |
|---|---|---|
21 | FTP | Ports opened for FTP service, used for uploading and downloading files. |
22 | SSH | SSH port, used to connect to Linux instances via command-line mode or remote connection software (e.g., PuTTY, Xshell, SecureCRT). |
23 | Telnet | Telnet port, used for Telnet remote login to QVM instances. |
25 | SMTP | Port opened for SMTP service, used for sending mail. |
53 | DNS | Used for the Domain Name Server (DNS) protocol. If a whitelist approach is implemented for outbound traffic in the firewall, port 53 (UDP protocol) must be allowed to enable domain name resolution. |
80 | HTTP | Used for HTTP service to provide access functionality, e.g., services like IIS, Apache, Nginx. |
110 | POP3 | Used for the POP3 protocol, which is a protocol for receiving email. |
143 | IMAP | Used for the IMAP (Internet Message Access Protocol), which is a protocol for receiving email. |
443 | HTTPS | Used for HTTPS service to provide access functionality. HTTPS is a protocol that provides encryption and transmission over a secure port. |
1433 | SQL Server | TCP port for SQL Server, used to provide external services. |
1434 | SQL Server | UDP port for SQL Server, used to identify which TCP/IP port SQL Server is using. |
1521 | Oracle | Communication port for Oracle. Port that needs to be allowed if Oracle SQL is deployed on a QVM instance. |
3306 | MySQL | Port through which the MySQL database provides external services. |
3389 | Windows Server Remote Desktop Services | Windows Server Remote Desktop Services port. This port can be used to connect to Windows instances using client software. |
8080 | Proxy Port | Similar to port 80, port 8080 is often used for WWW proxy services and web browsing. If you use port 8080, you need to add :8080 after the IP address when accessing a website or using a proxy server. After installing Apache Tomcat service, the default service port is 8080. |
137、138、139 | NetBIOS Protocol | Ports 137 and 138 are UDP ports used for file transmission via Network Neighborhood. Port 139: Connections through this port attempt to obtain NetBIOS/SMB services. The NetBIOS protocol is often used for Windows file and printer sharing and Samba. |
Link Instances
You can bind or replace a firewall for your instance in the following two main ways:
1. On the Instance Details Page: Navigate to the details page of the target cloud server, locate the "Firewall" tab, and click the "Change" button.
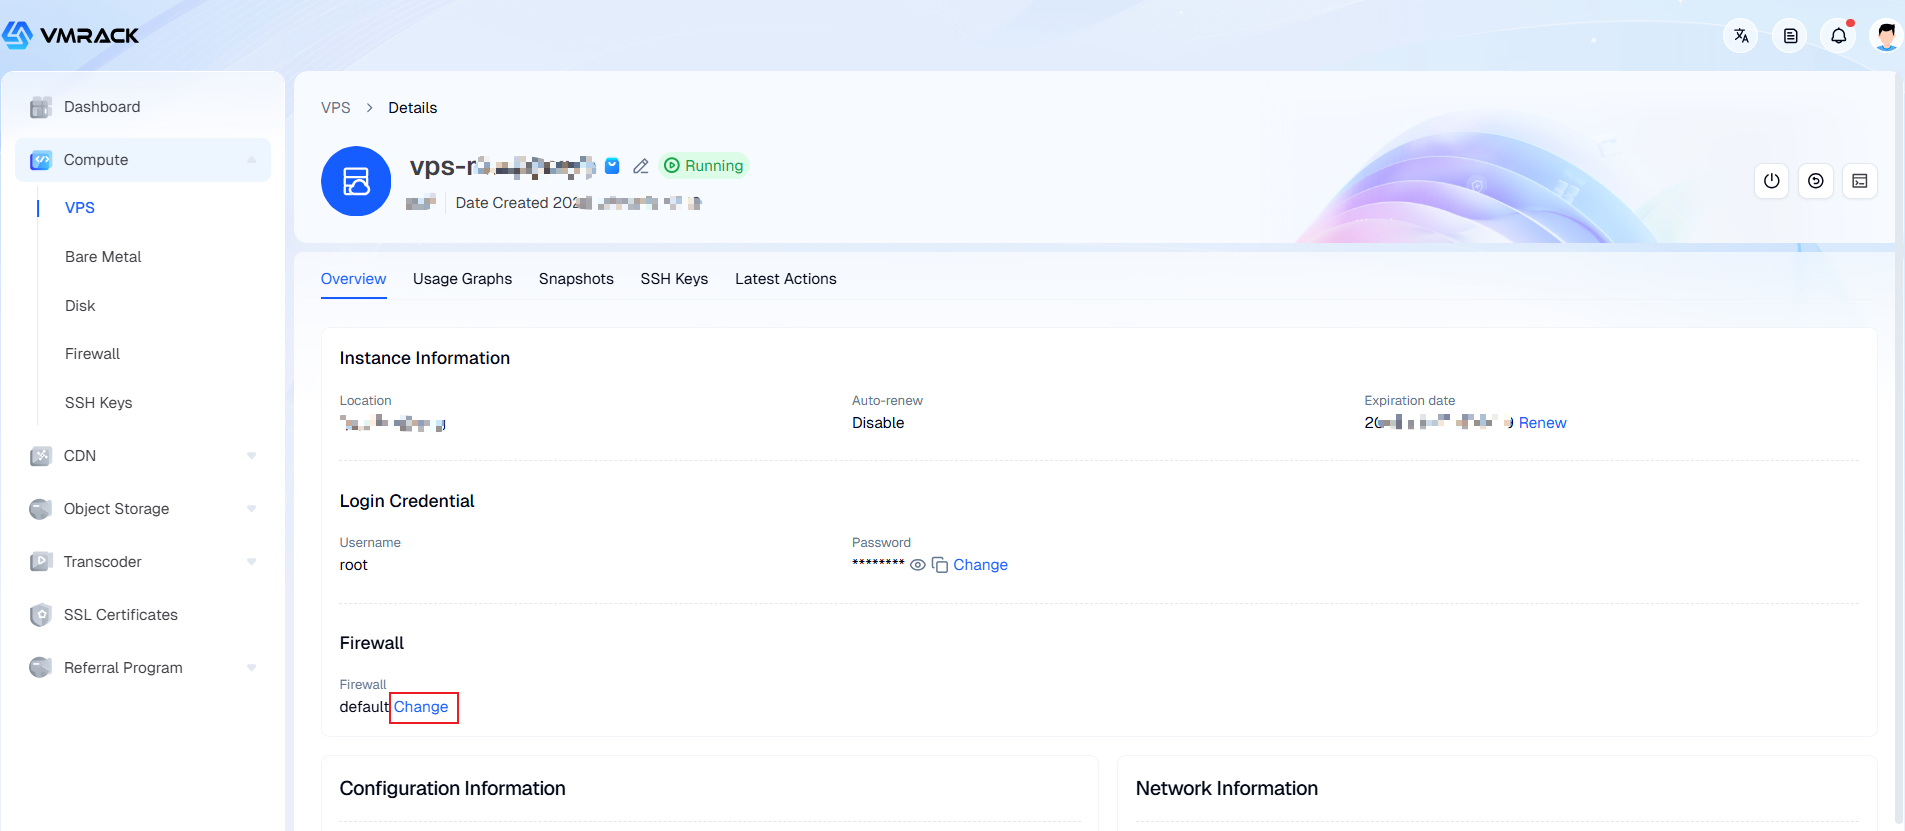
2. On the Firewall Page: In the firewall list, on the target firewall configuration page, manage instance associations under "Linked Instances".
SSH Keys
An SSH key pair is a more secure and convenient method for remote login authentication compared to passwords, especially suitable for Linux instances. It utilizes asymmetric encryption technology, consisting of a public key and a private key.
Public Key: Placed inside the cloud server instance. Used to verify the private key and can be made public.
Private Key: Kept locally by you and must be strictly confidential. Used to log in to the instance and prove your identity.
Create an SSH Key
1. Log in to the SSH Keys list in the console.
2. Click "Create SSH Key", as shown in the image below:
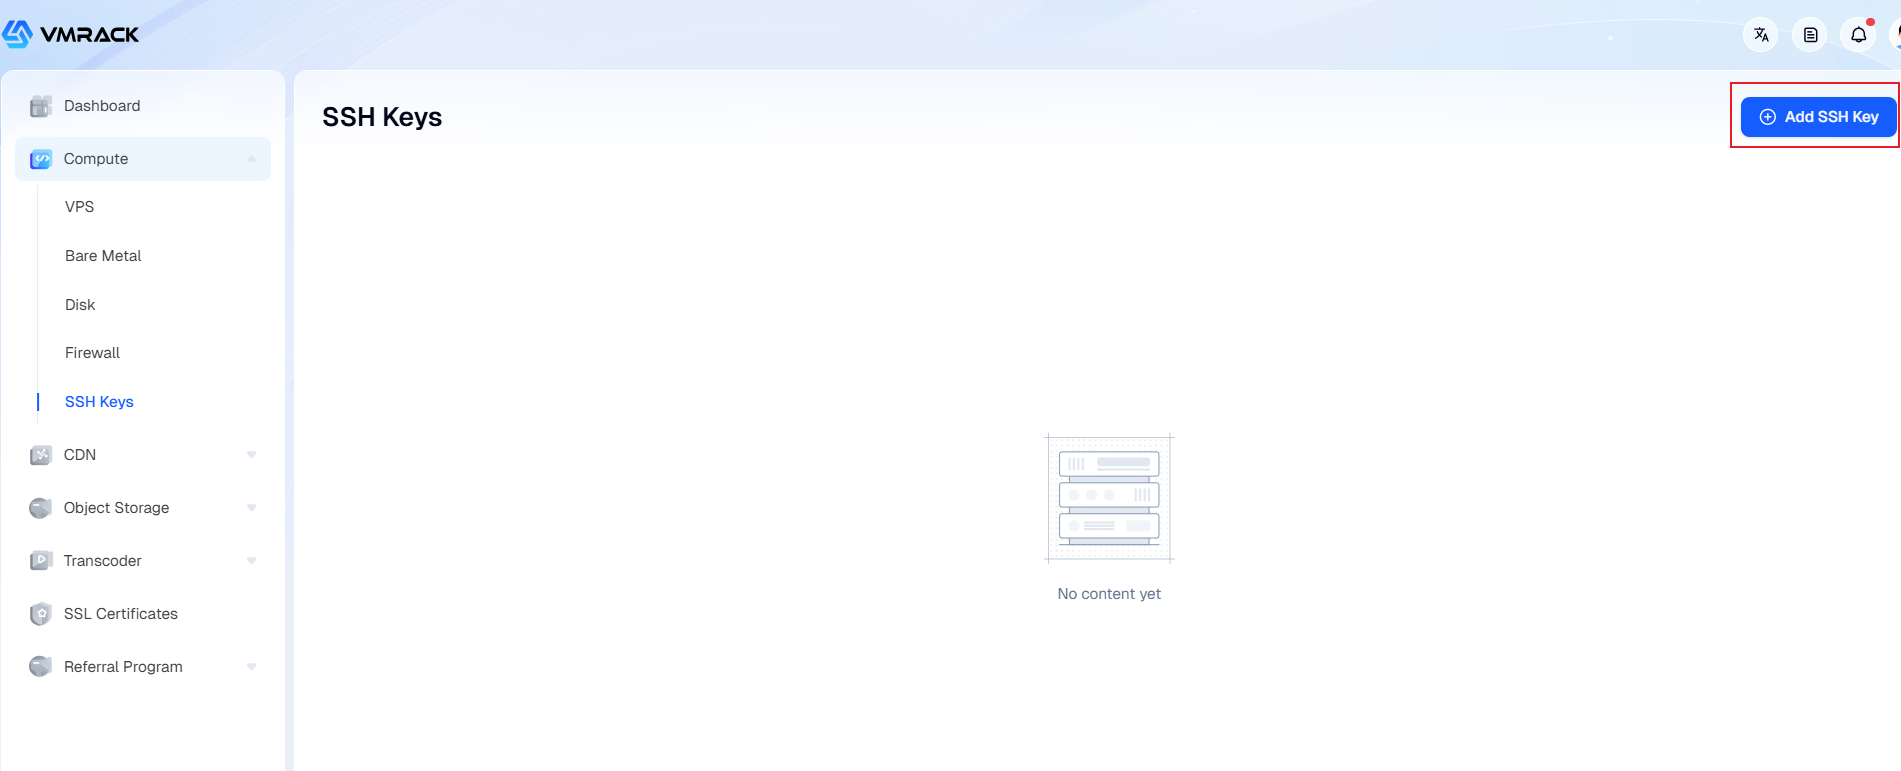
3. In the "Create SSH Key" dialog that appears, enter a key name and click "Save".
4. Upon successful creation, the private key file (usually in .pem format) will be automatically downloaded by your browser. Please save it to a secure local location.
The private key file cannot be recovered if lost. Never send it directly via messaging tools or upload it to public code repositories.
Import Existing Public Key
1. Log in to the SSH Keys list in the console.
2. Click "Create SSH Key" and select "Import Key".
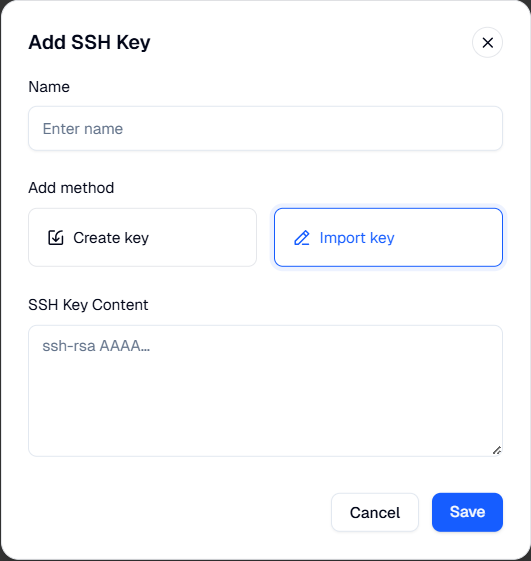
3. Paste the contents of your local public key file and assign it a name.
Bind SSH Key to Instance
Bind during instance creation:
In the "Login Credentials" configuration step, select "SSH Key", then choose the key pair you have already created from the list.
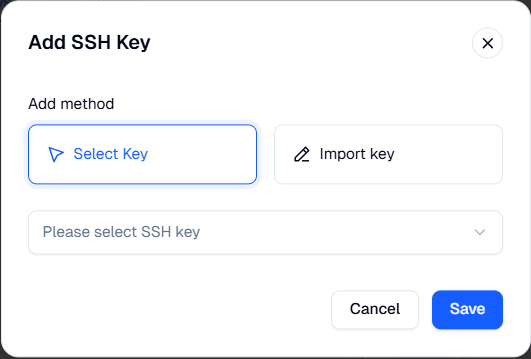
Bind to an existing instance:
Go to the details page of the target instance.
On the "SSH Keys" page, click "Add SSH Key", then select the key pair you have already created from the list.
Log in Linux Instance Using an SSH Key
Ensure that the firewall associated with the instance allows traffic on TCP port 22 (the default SSH port).
Method 1: Log in via Local Terminal/SSH Client
1. In a local terminal (Linux/macOS) or using an SSH client (such as PuTTY, which may require converting the private key format), connect with the following command:
ssh -i /local/path/to/your/private-key.pem root@<instance-public-ip>2. If this is the first connection, the system may ask you to confirm the host's authenticity. Type yes to proceed.
Method 2: Log in via the Console
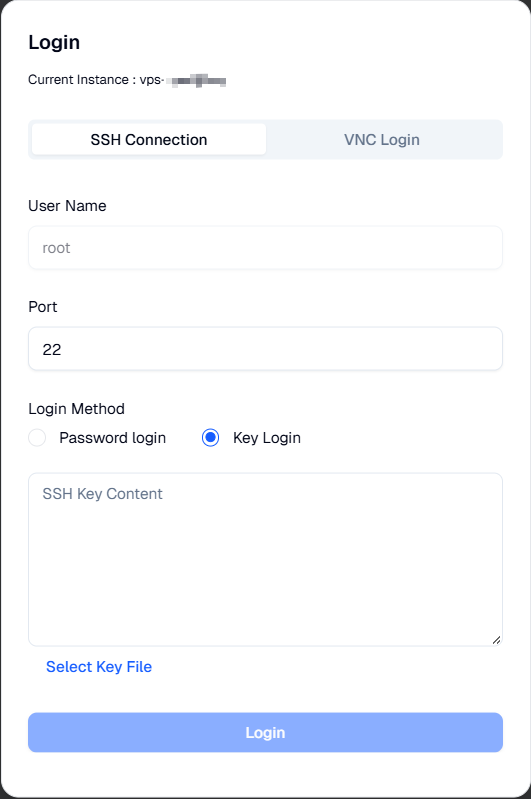
1. From the instance list or details page in the console, click the "Login" button.
2. In the login dialog that appears, select the "SSH Key Login" option.
3. You can either "Paste Private Key" (copy and paste the contents of your local private key file into the input box) or "Upload Private Key File" (typically supporting .pem format).
- Products
- VPS Hosting
- VPS HostingUnmetered
- Bare Metal
- GPU Rental
- CDNPublic Beta
- Custom CDN
- Object StoragePublic Beta
- TranscoderPublic Beta