
Quick Start
This guide will lead you through the VMRack management console to complete the activation of Object Storage service, bucket creation, and file upload operations in a few minutes.
Login & Preparation
Before using the object storage service, you need to have a VMRack account.
Sign up / Log in: Visit the VMRack official website and log in to your account.
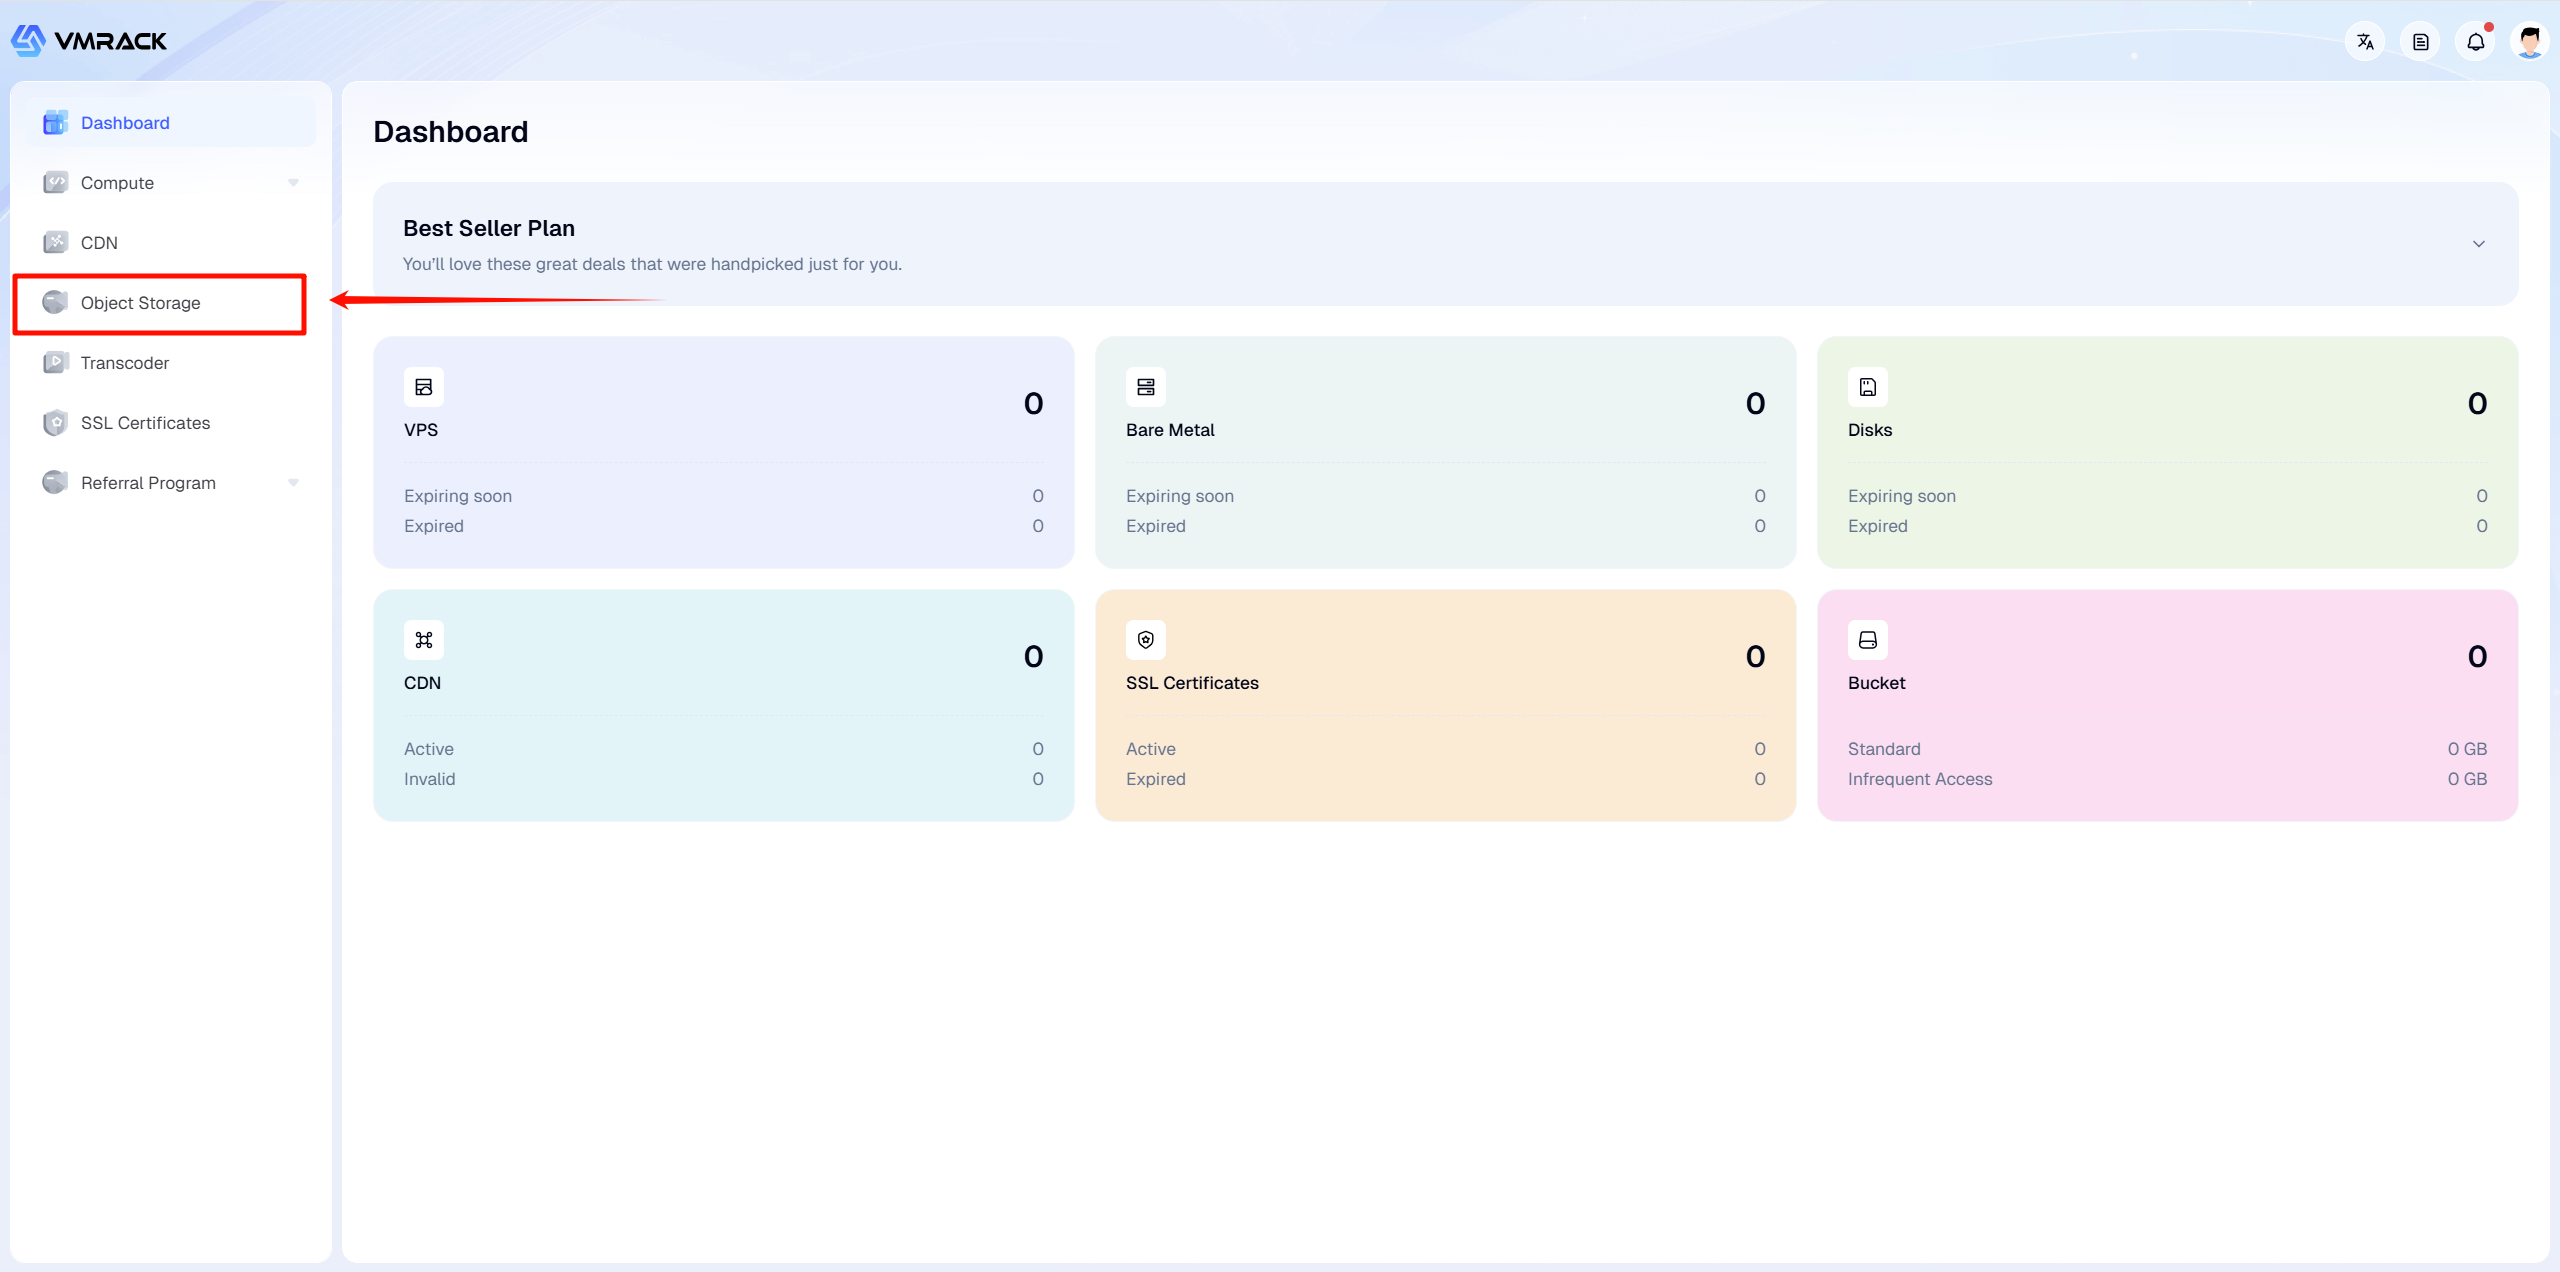
Enter Console: After logging in successfully, find the "Object Storage" menu in the product list on the left.
Activate Service
By default, the object storage service is in an inactive state.
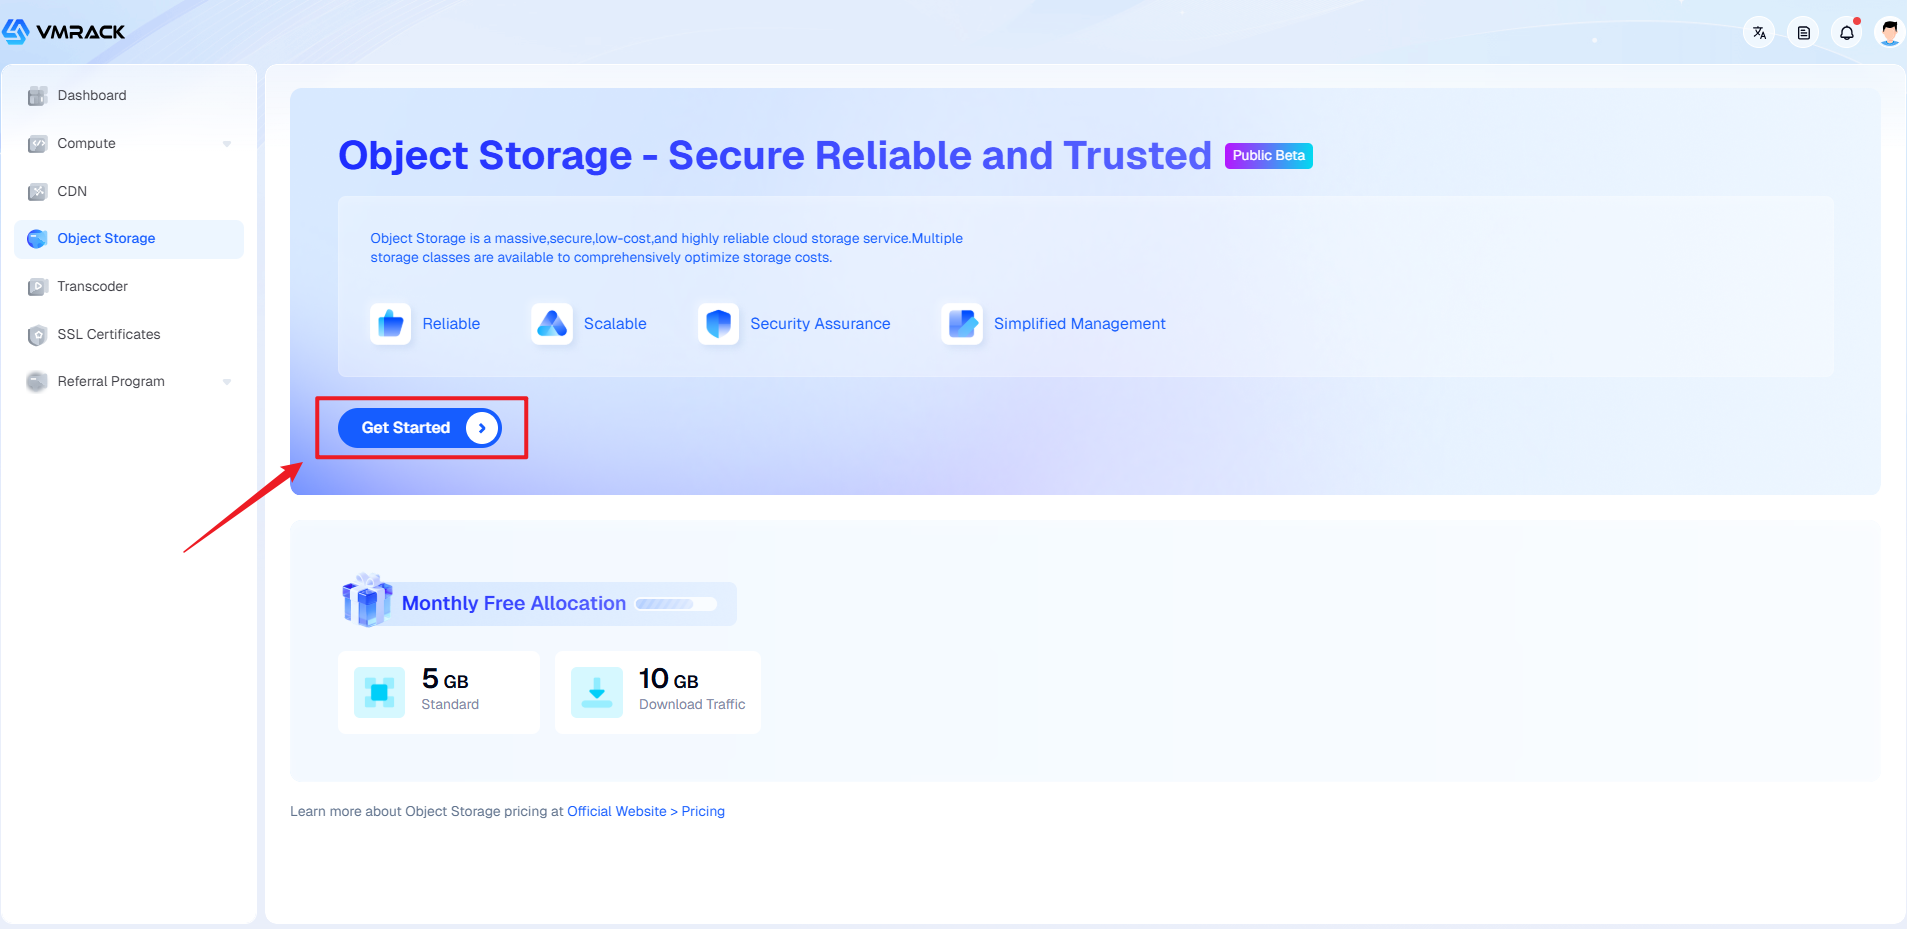
Click to Enter: Click the "Object Storage" menu, and you will see the service activation guide page.
Activate Now: Click the "Activate Now" button on the page.
Complete Initialization: The system will automatically initialize the storage environment. You can jump to the bucket list after a few seconds.
Note: Activating the service means you agree to the Pay-As-You-Go agreement, Activation itself does not incur charges. Fees are deducted only after you begin storing data or generating traffic.
Create Bucket
Buckets are containers for storing objects; all files must be stored in a specific bucket.
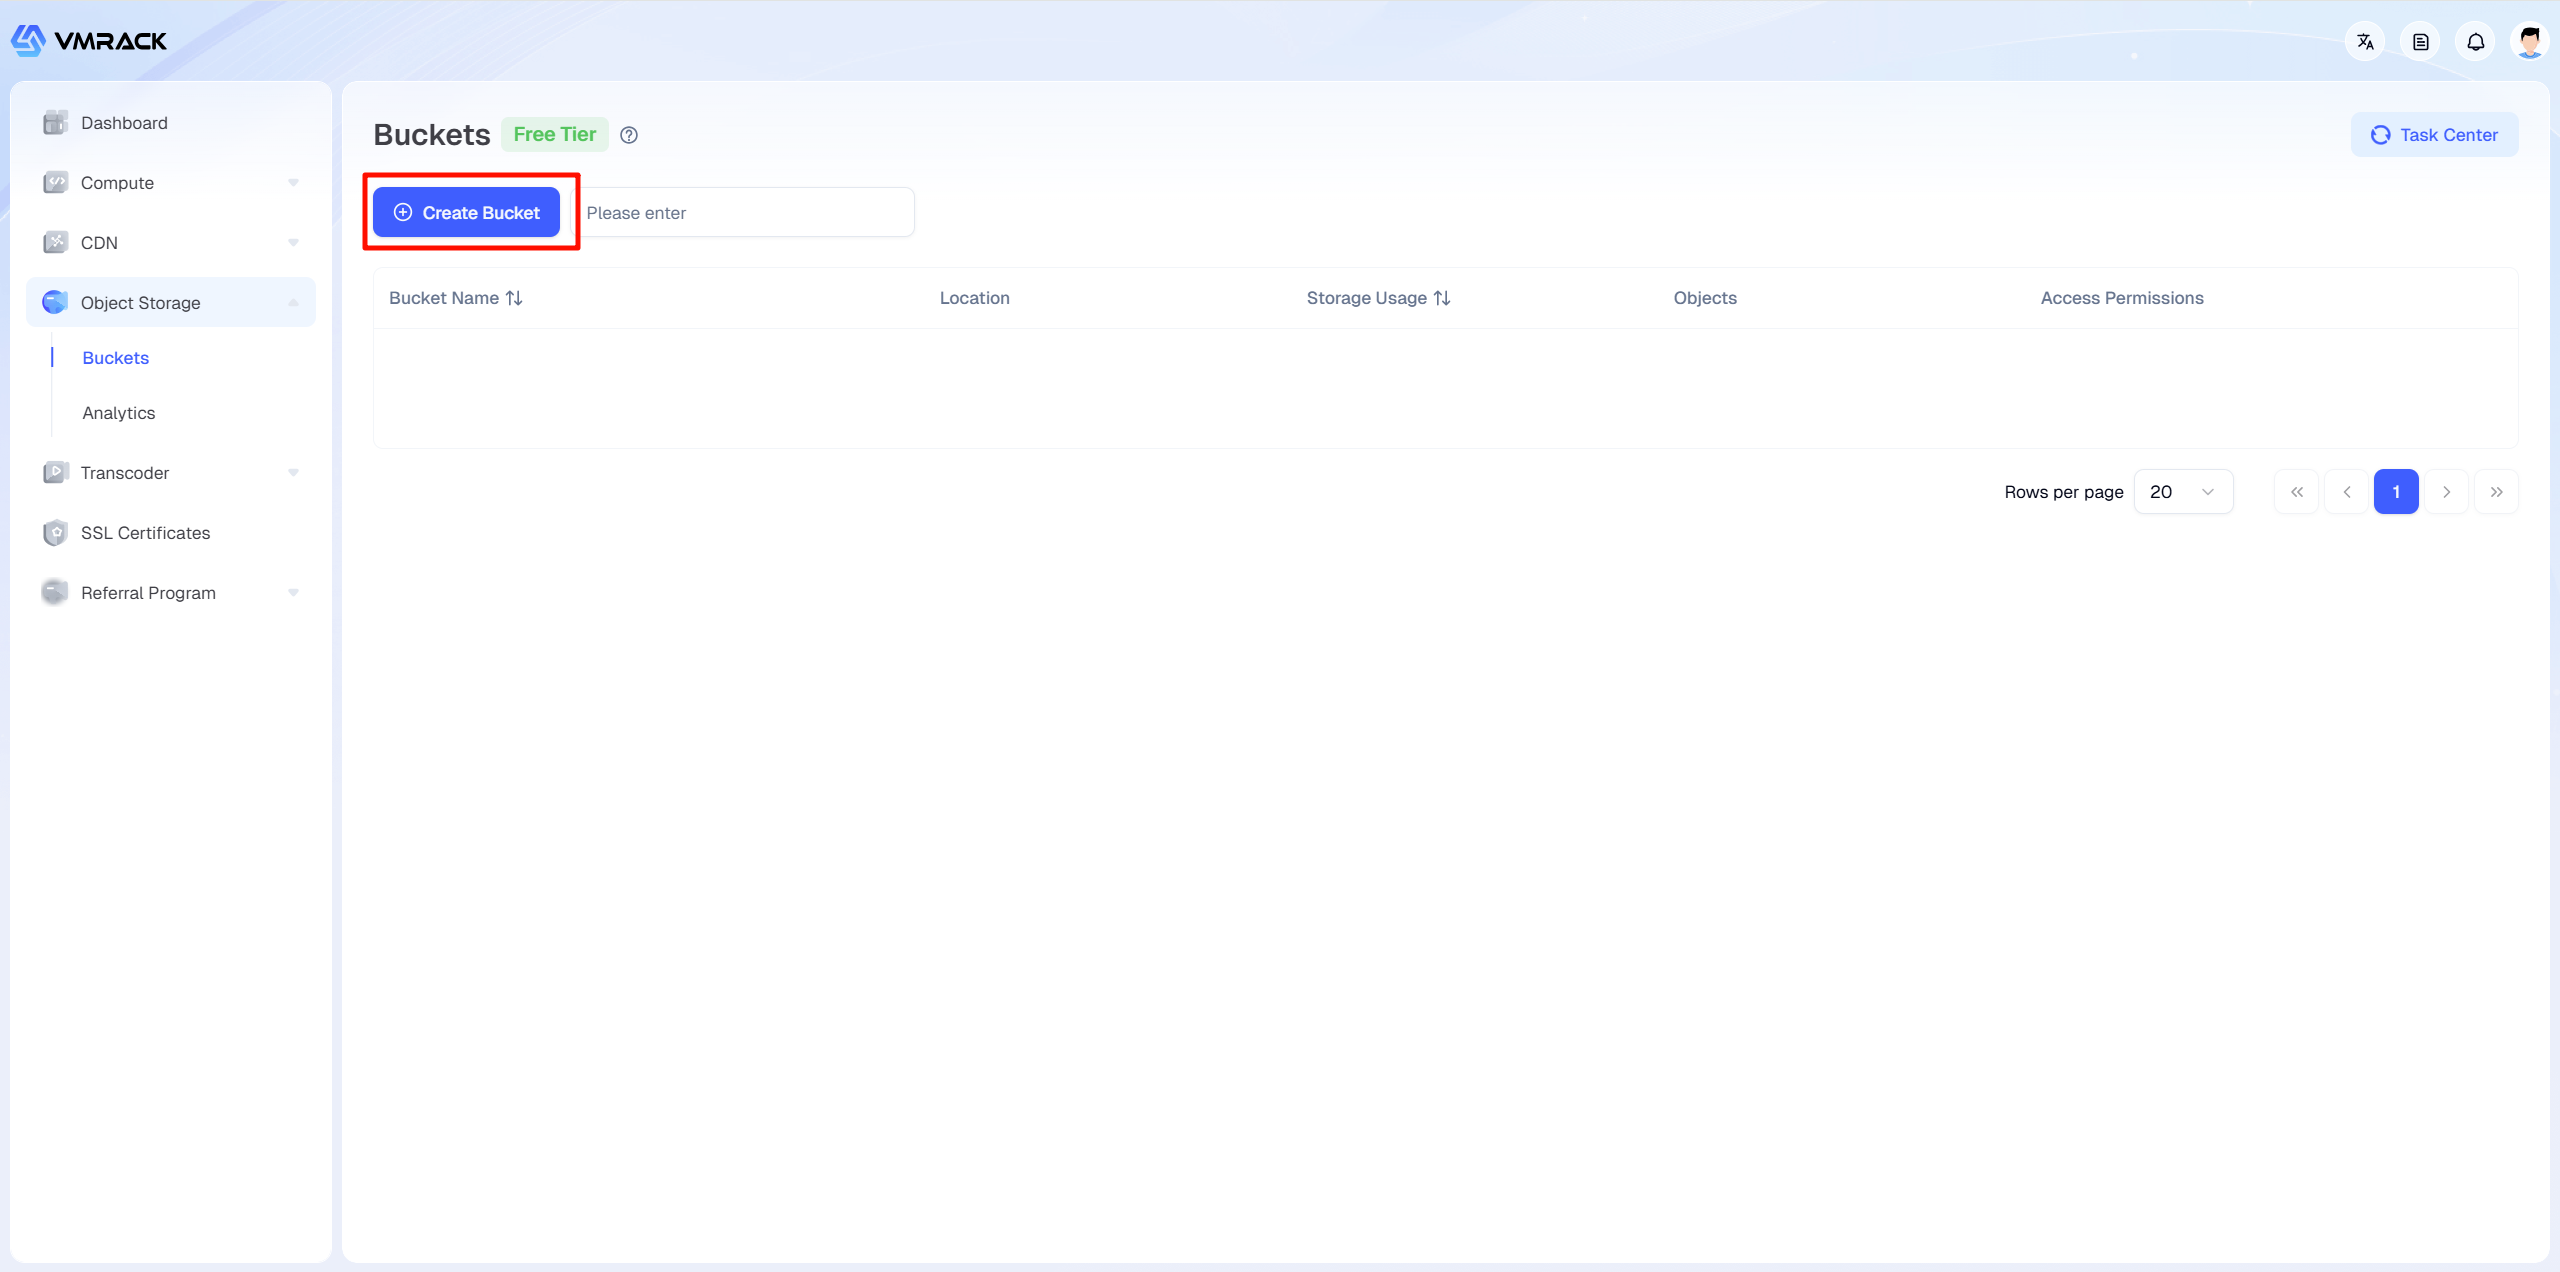
Start Creation:
Click the "Create Bucket" button in the top left of the storage bucket list.
Configure Parameters:
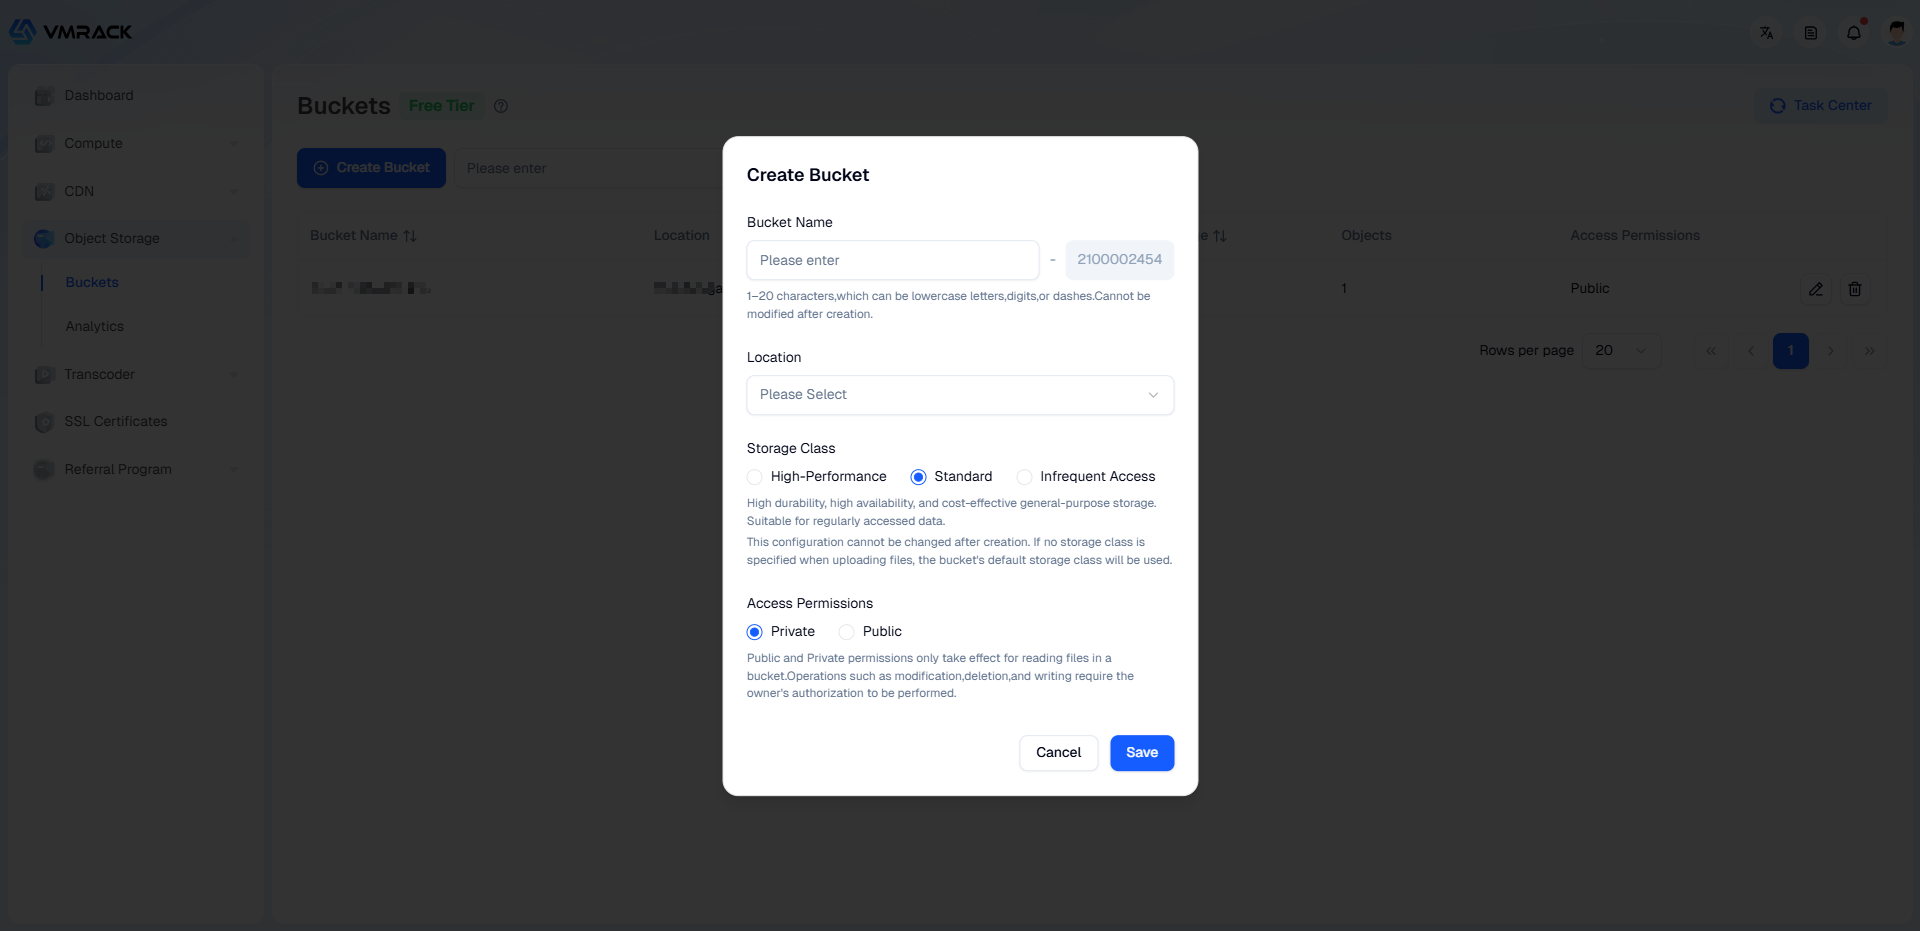
Complete the following settings in the popup window:
1.Name: Give your bucket a name.
Rule: Globally unique, only supports lowercase letters, numbers, and hyphens
2.Region: Select the data center location. Advice: Choose the closest region to your target users to get faster upload/download speeds. Prices in different regions may vary.
Access Permission:
Set the default access policy for the bucket.
1.Private: (Recommended) Files are not visible via public link by default. Only visible to the owner after logging into the console.
2.Public: Files can be accessed directly via HTTP/HTTPS links on the internet. Suitable for website images, file downloading stations.
Confirm Creation:
Check that the configuration is correct, then click the "Confirm" button.
Create Folder
For better data management habits, it is recommended to plan the directory structure first.
Enter Bucket: Click the bucket name you just created in the list to enter details.
Click Create: Click the "Create Folder" button on the top of the page.
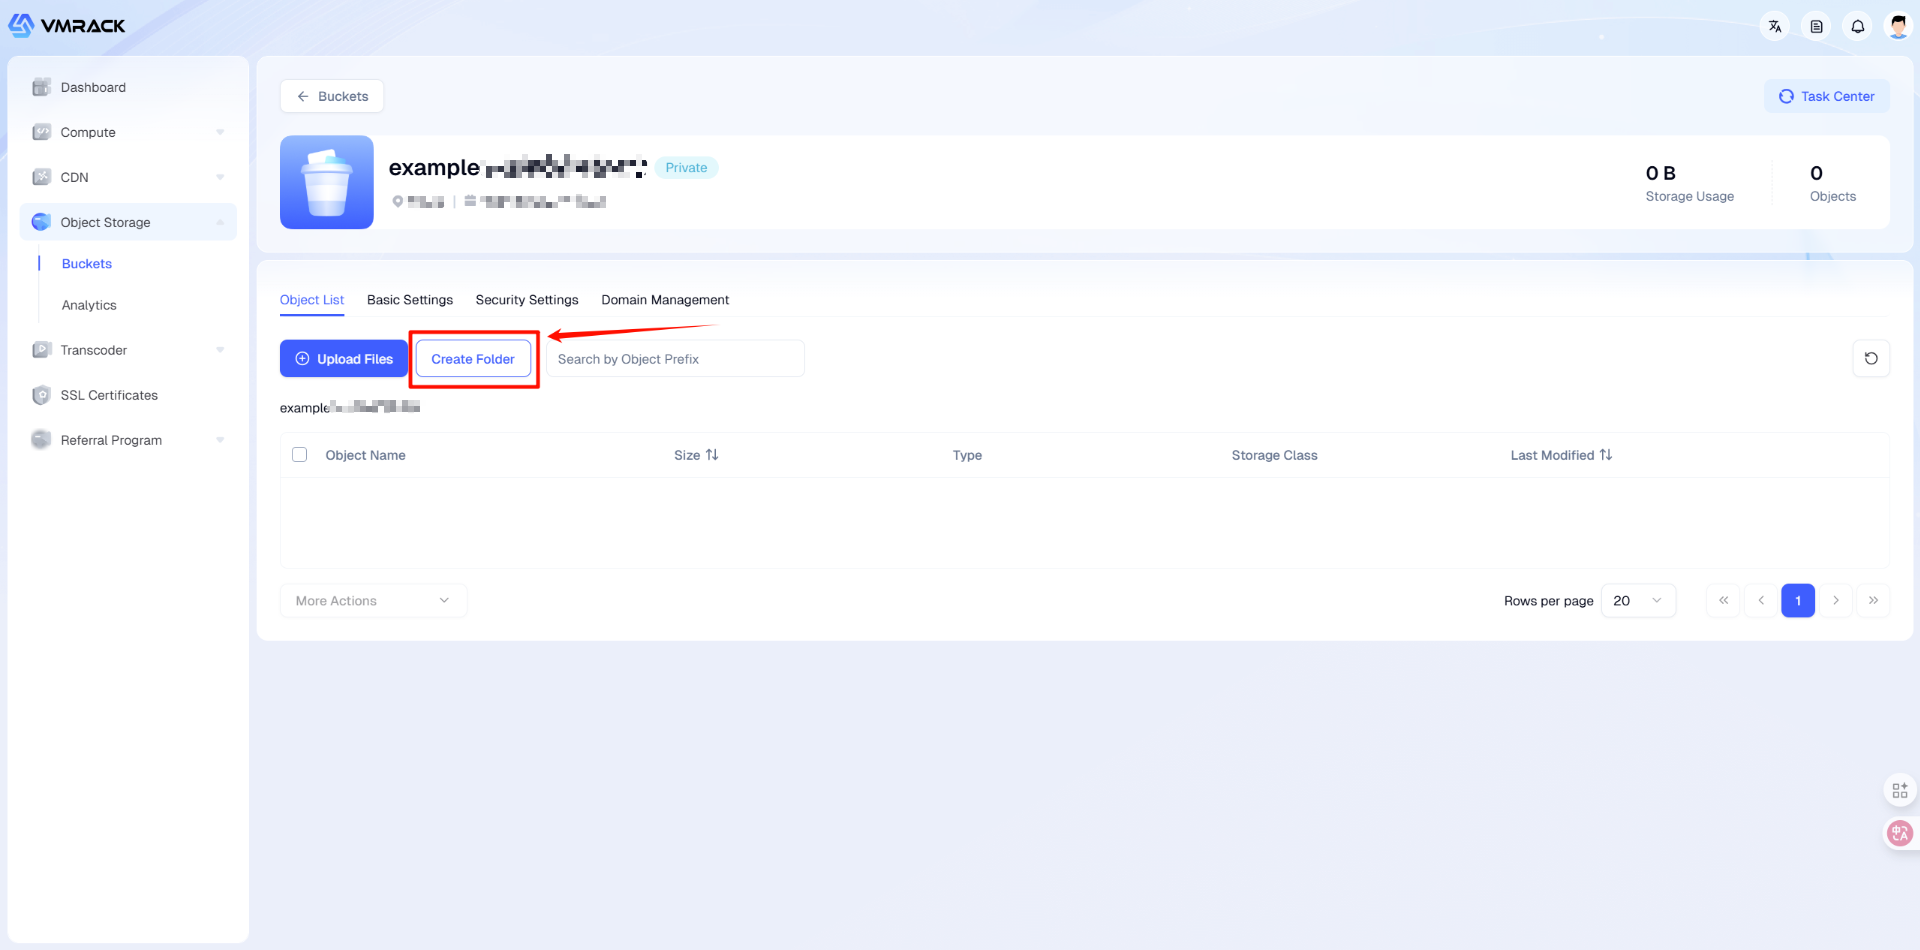
Click Create: Click the "Create Folder" button above the list. (Note: This step appears redundant in the original text, but reflects the UI flow).
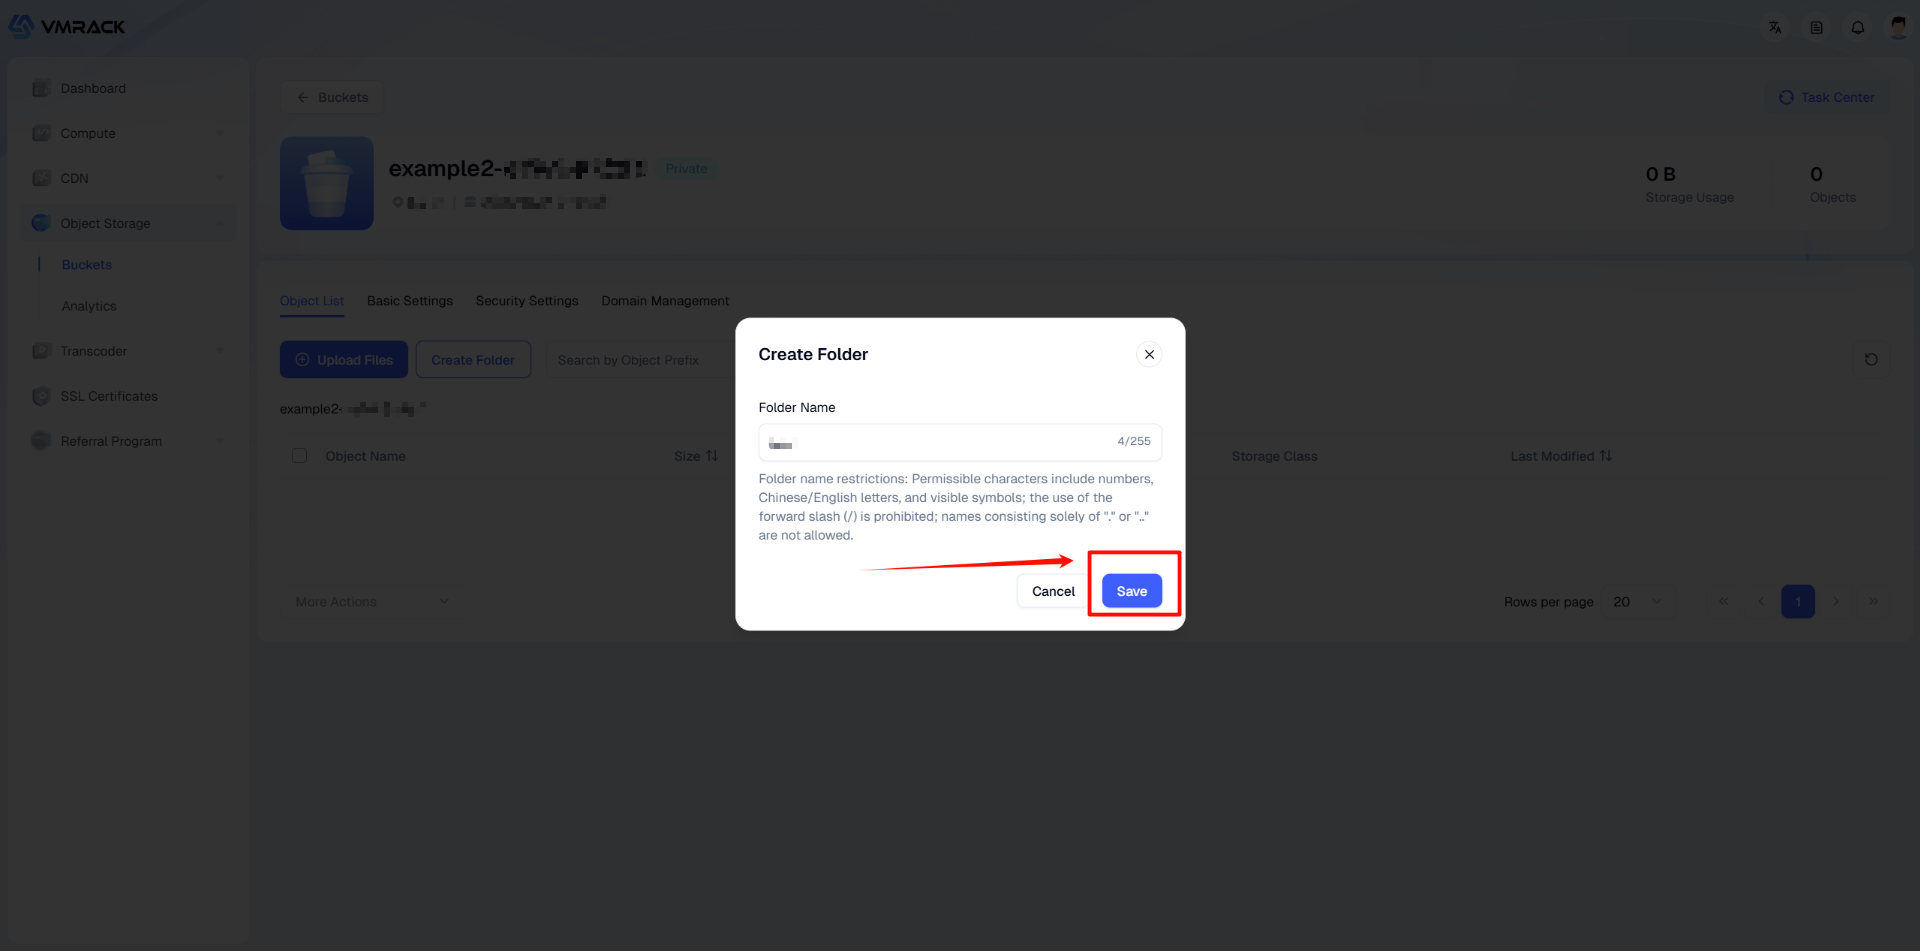
Input Name: Enter the folder name and click confirm. The list will display the folder immediately.
Upload File
After creating the bucket, you can start uploading files.
1.Enter Bucket: Click the storage bucket name created just now in the list to enter details.
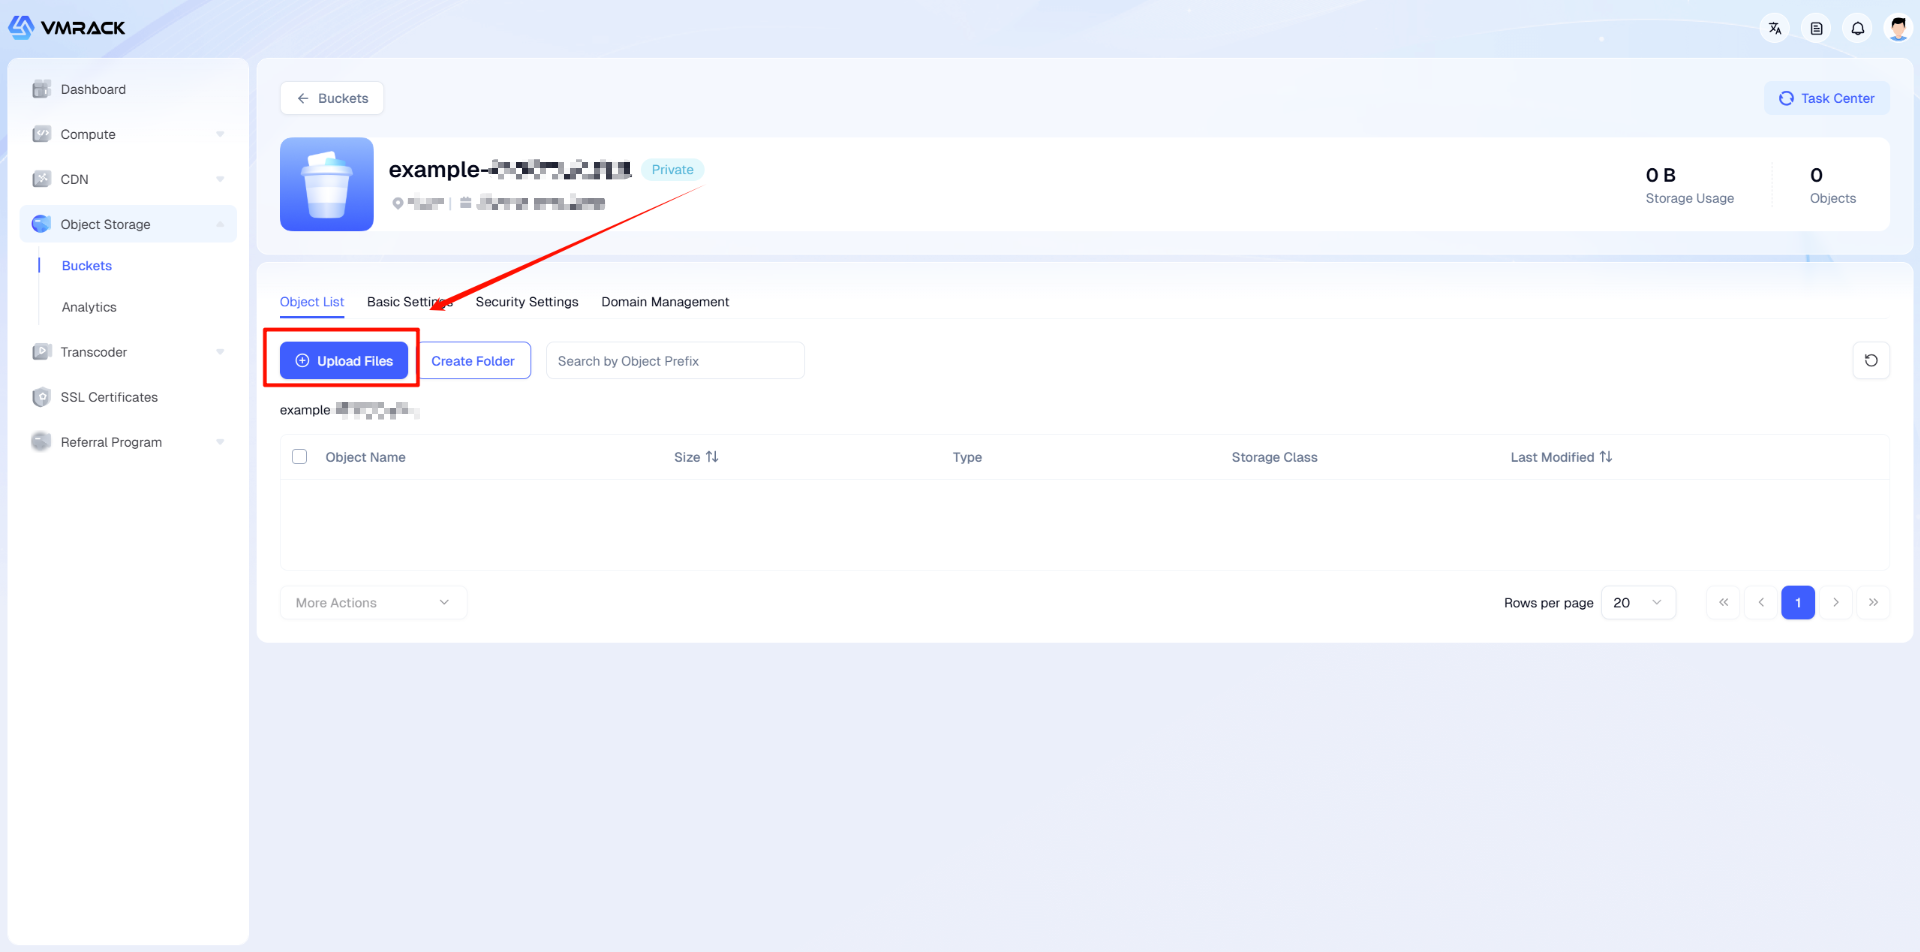
2.Click Upload: Click the "Upload File" button on the top of the page.
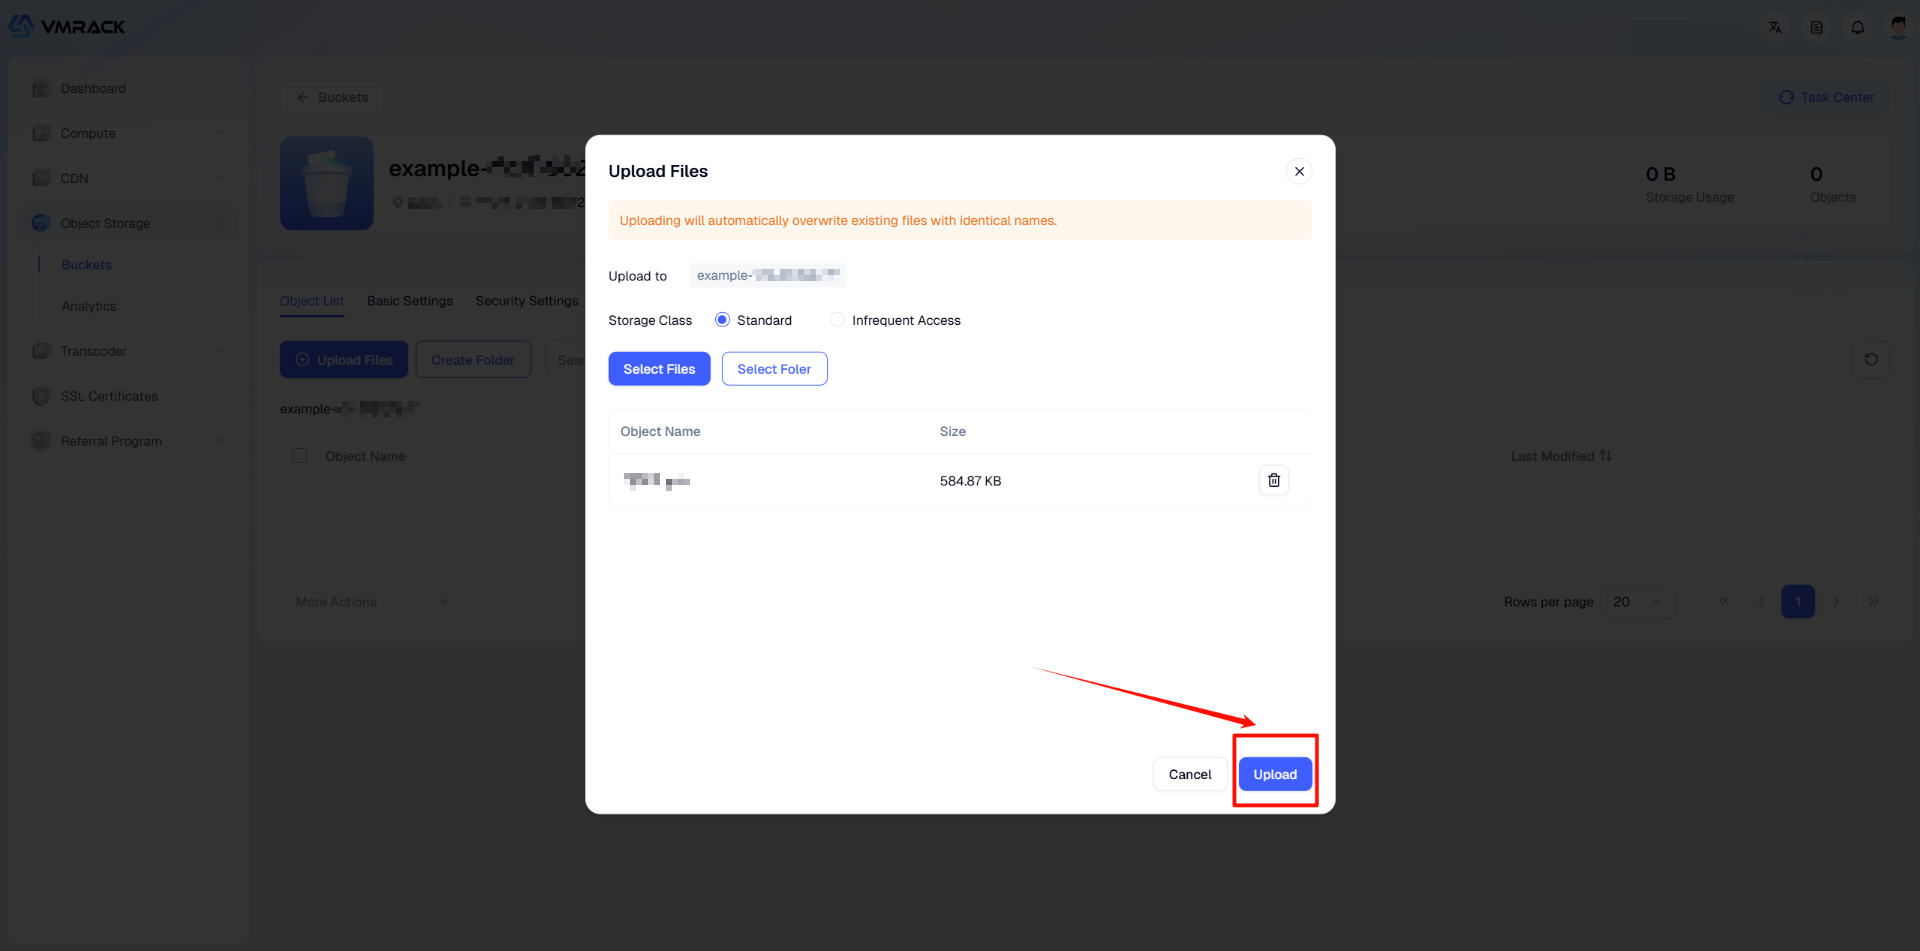
3.Select Storage Class: In the upload window, select the storage class based on file usage (Directly affects costs):
Standard Storage: Suitable for frequent access data (like website images).
Low Frequency Storage: Suitable for infrequent access data (like backup archiving), lower rate.
Tip: Every user has 1GB Standard Storage and 2GB Low Frequency Storage free quota per month.
4.Add File:
Directly drag and drop local files to the upload area.
Or click "Select File" to browse the local disk.
Note: The system supports a maximum size of 20GB for a single file upload.
5.Start Upload: Confirm no errors, click the "Upload" button to start. Wait for the progress bar to complete.
Get Link
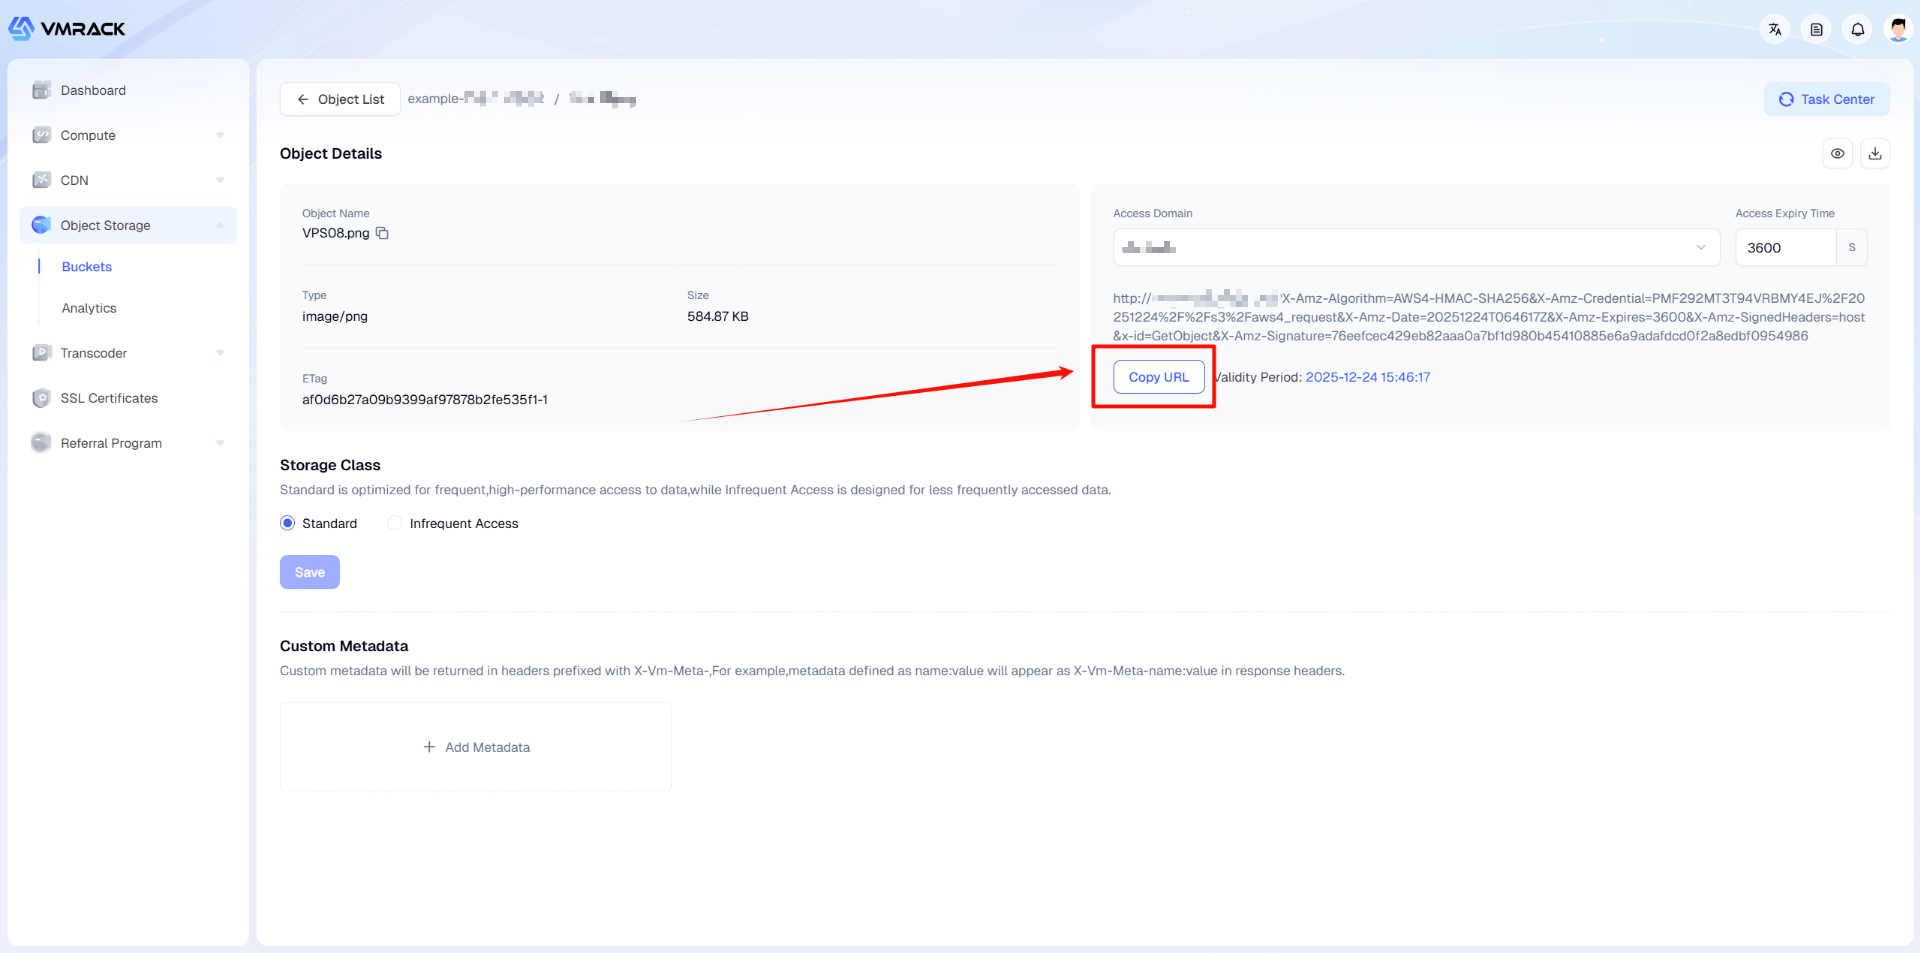
After the file upload is successful, you need to enter the file details page to get the access link.
Note: When using the sharing function for the first time, you must bind the storage bucket access domain name.
1.Enter Details: In the file list, click the specific file name to enter the file details page.
2.Configure Access Domain:
In the "File Link" area on the right, if you see the prompt "Domain not configured, unable to visit", please click the "Settings" link below.
Follow the system guide to bind your custom domain or use the test domain provided by the system (Depending on visual configuration).
3.Get Link: After the domain configuration is completed, return to the file details page. At this time, the "File Link" area will display the complete access URL of the file. Click copy to share immediately or quote it on the website.
- Products
- VPS Hosting
- VPS HostingUnmetered
- Bare Metal
- GPU Rental
- CDNPublic Beta
- Custom CDN
- Object StoragePublic Beta
- TranscoderPublic Beta