
Connect to Instance
Once the instance is successfully created, you can try logging into your VPS via the VMRack console and proceed with operations such as website setup based on your actual needs.
1. Log into the console and navigate to the VPS list.
2. Locate the instance you wish to access and click Log In on the right-hand side, as shown in the image below:
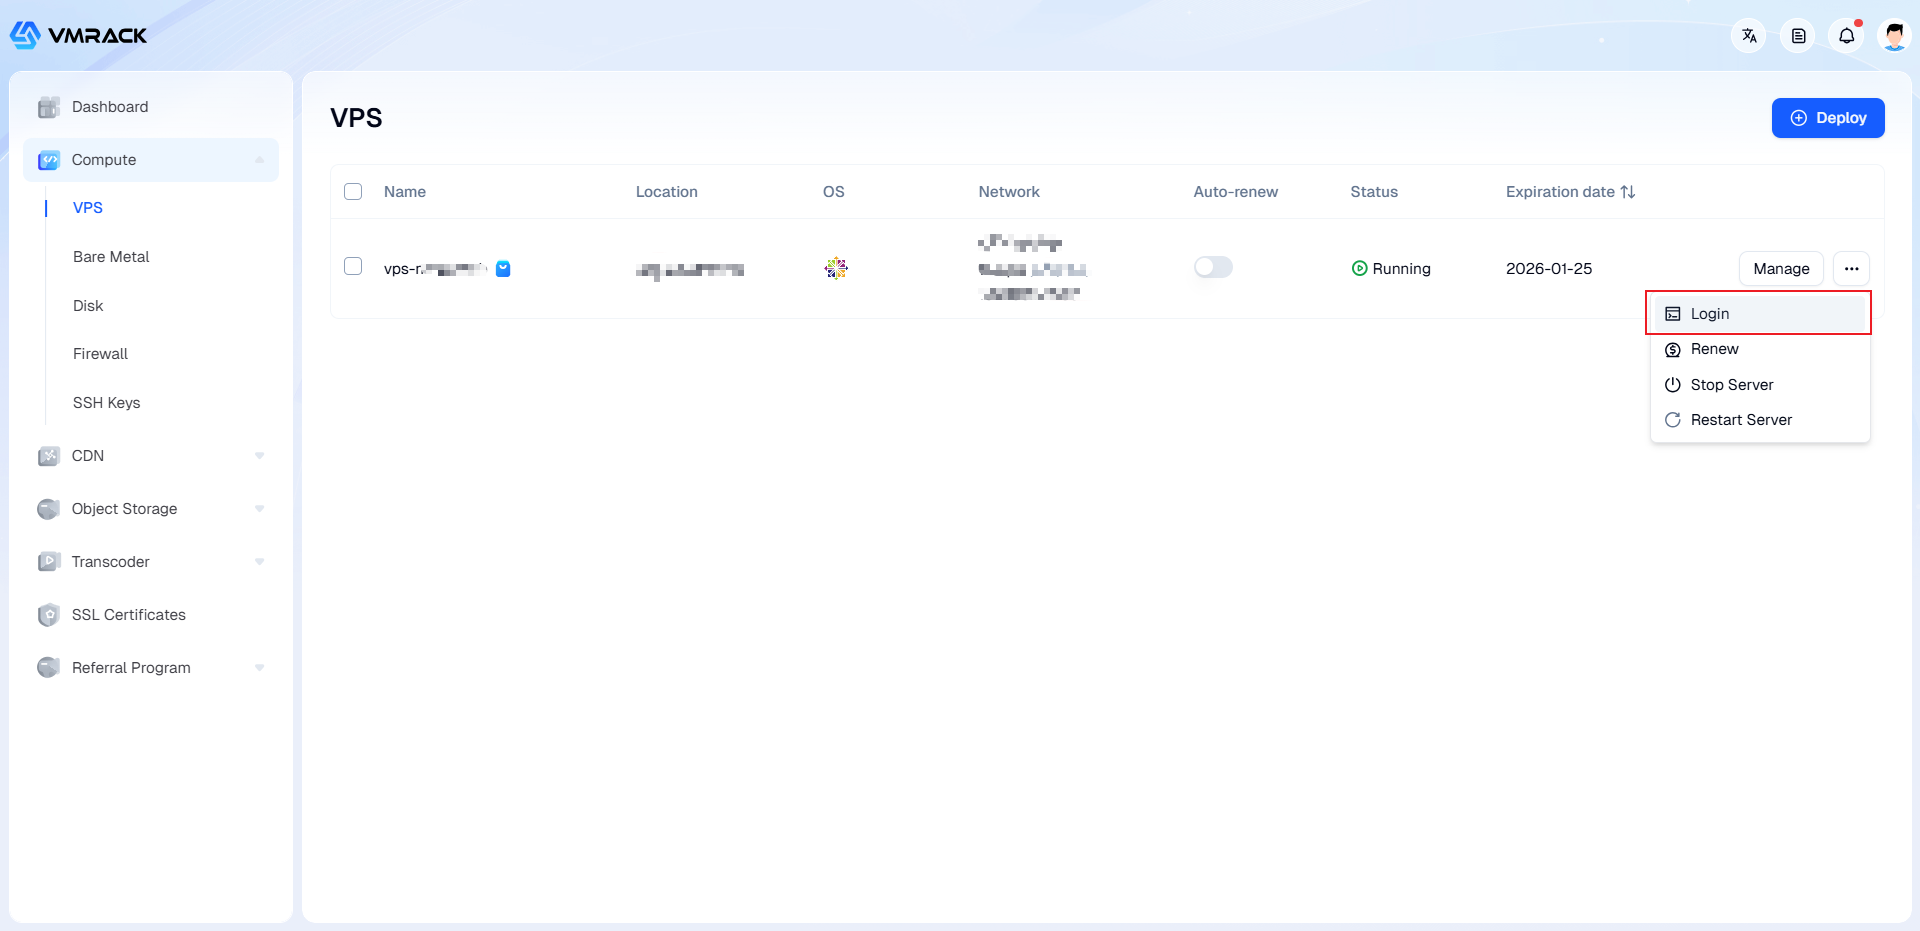
3. In the Log in to Instance dialog box, choose your preferred login method: Password Login or SSH Key Login.
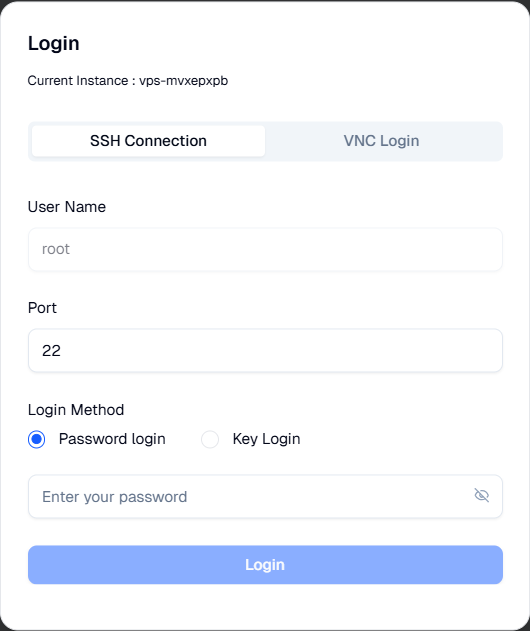
4. Fill in the required login information as explained below:
Port: Default is 22. Modify as needed.
Username: Default is root for Linux instances and Administrator for Windows instances. Modify as needed.
Password: Enter the password you set when purchasing the instance.
Key: Select the SSH key already bound to the instance (for key login).
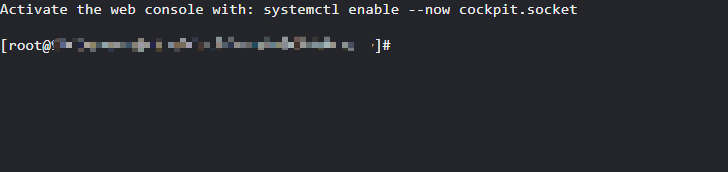
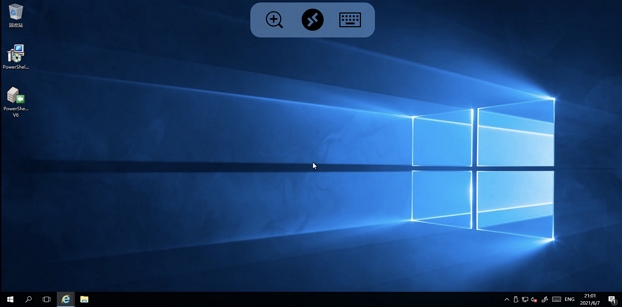
5. Upon successful login, the WebShell interface will display a page similar to the following:
Linux Systems:
Windows Systems:
- Products
- VPS Hosting
- VPS HostingUnmetered
- Bare Metal
- GPU Rental
- CDNPublic Beta
- Custom CDN
- Object StoragePublic Beta
- TranscoderPublic Beta